Search the Community
Showing results for tags 'kato'.
-
New DCC Friendly list for Kato. https://docs.google.com/spreadsheets/d/1qRGTOaq-4F89xph3ZxL5iKxM5jptkeoNw77t3X-STY4/edit?usp=drivesdk If you have new data or updates, please reply here and I will incorporate the changes Please keep replies to just updates, if you have installation issues/questions, please start a thread for that model. Thanks, Ed
-
Since I'm planning to operate some of the Kato Pocket line models, I looked through Amazon and saw that the KATO N Gauge Chibi Convex Set has these funky couplings that my Southern Pacific observation car has(https://www.amazon.com/gp/product/B07R46SS4G/ref=ox_sc_act_title_6?smid=A28V1QXS53MQKP&th=1), and I'm planning to convert them to the standard KATO couplings that most of the rolling I own, for the reason is that I'm planning to operate with American cabooses, as caboose hops and probably some passenger excursions. Still, I don't know what materials to start or how to convert the model in the link safely so I won't damage the model, any tips will help. -Dillon Trinh
-
I recently got some Kato 11-211 interior LED coach lights, but unfortunately am having issues with them. They all worked at first - but in the days since two have stopped working properly: - One of them works only in one direction, when I switch the DC direction it turns off. - The other just doesn't turn on at all. I've tried both in multiple different coaches (which work with other 11-211s) and it doesn't fix it, so the issue must be with the light components. I'm assuming I've somehow shorted the second one or something (no idea how), but I don't understand why the first would work in only one direction... Any ideas would be greatly appreciated!
-
Hi guys, I'm finally feeling the urge to take the plunge and delve into making my very first permanent N scale layout from scratch starting from the bench work construction of a dedicated table to fully furnishing it with scenery. It'll be something I'll want to make taking inspiration from a few other Japanese layouts by members in the Japanese Railway Society and possibly some here. I'd like to make it a layout I can proudly display at convention centers and train shows (who wouldn't), without being sanguine for my first project. The name I have so far christened it with (桜木の湯線) is after the area I'm in as well as mentioning my love of cherry blossoms and hot springs. I'd like it to be a mostly steam JGR/JNR era fictional layout. There may be no catenary, but I'll have many EL that I like (EF13, EF65) running on it as well! The first stage in my mind is configuring the final track layout before the first shovelful of sod is turned. I'm using an app called "TrainDesign" to make a relatively complex track arrangement (hopefully not too advanced for my first layout) with KATO N Unitrack to fit within the confinement of space (a single table 1462 mm x 906 mm) I'm willing to spend in my apartment. Does anyone have experience using this, or would they recommend another program? The train table is something I'd really like to make the most of by having it be sturdy, portable and also presentable while still remaining practical and minimal in its embellishments. To give it a "Japanese" flavor, I'd like to stain and lacquer the wood finish of the fascia of the table and add ropes at the narrow ends for carrying it. A layout depicted below ("Yama no yu sen") built by Stephen Gomersall is said to have done such. Note the pedestrian bridge. I'm looking into more details about this layout for more inspiration. Any suggestions or advice? I thank you all for any help you can offer so I put my best foot forward! The layout will also strongly take inspiration from this depot model of a fictional Japanese roundhouse called "Kamanashi Kikanku" built by Phil Hendry. I hope to acquire the same or similar kits from which the roundhouse and turntable were built (Fleischmann). If anyone knows a good locale to purchase them, many thanks! I will soon shown the decided general track plan and rough sketches of the table I'll want to build for sociable critique before moving to the next stage; buying materials. Aside from the roundhouse mentioned above, I intend to have an engine house as well, merely since I'd like there to be plenty of space devoted to showing off my locomotives awaiting their next turn of duty. I have the three bay engine house kit that resembles the classic stone one in Hitoyoshi, one of my favorite landmarks on the line. I would however like to alter the color of the brickwork of the kit by making them a lighter shade (like the VoR shed below) to match the cedar woodwork of the table. If anyone has experience with kits such as what techniques or paints can be used to achieve this, much appreciated. Update (Nov 2, 2023): Here's the current track plan design courtesy of Doug Coster who rendered this for me in 3D. I'm pretty satisfied with it.

-
Hi everyone, I wanted to build a small permanent layout before starting my project of building parts of the Tarumi Line. It is to see my trains running regularly and getting used to the smaller size of N-scale compared to H0. The space I have to build a permanent layout is 50cm x 85 cm. It is not much but since I'm focussing on Tarumi Line and I found that the models are labeled that they can pass mini curves the radius can go down to R140. So Katos R183 should be doable as a minimal radius. For a bit more space I can temporarily add another segment of 30cm (which I expanded to 30.8 cm, like a standard T-Trak module). To get the additional space as more running space I thought about adding the temporary segment between the permanent layout instead of just expanding it. That means I will split the 50cm into 2 parts which makes it 2 segments of 25cm x 85cm. My current plan is in the picture and I will explain my thoughts on it now: The double track will be spaced so you can connect T-Trak module to the segments to expand it if I ever want to or have T-Track modules on hand. The green areas would be only normal landscapes like grass, trees, and so on. On the top right, you can see the platforms of a rural station with a bridge connecting them. For the station building I wanted to already start modeling one of the station buildings from the Tarumi line and the smallest was at Higashi-Ōgaki Station. The colored part next to the station will become mostly residential buildings. I don't know if I will buy premade kits or go for some buildings you can find along the Tarumi Line here too. I wanted to have a bit of a freight service too and chose cement as the freight which was handled on the line till 2005/2006. On the track section 5 the freight cars would be loaded with cement and unloaded on section 9 or 10. That is why the industry on the segment in the middle would be a concrete plant and on the bottom segment, it would be the cement manufacturing plant. Greeting Junech -> The building of the layout can be found here.
-
hello im new to this forum which material should I use to build a guideway similar to this video did their use megnetic or something else? and what is wheel are called?
-
In December of 2022 I made first trip to Japan and fell in love with its rail network and history. I even went to the KATO stores in Tokyo and Kyoto and bought my first N scale and first Japanese model trains. Even made a stop at the Kyoto Railway museum. Fast forward to May of 2023 I had purchased more trains, track, and accessories to begin building a new layout. It took about two months to build and detail, but for my first layout since I was a kid, I’m happy with it. below, you see how it was built from ply board and foam. My initial track planning and laying, and later detailing.
-

kato Free Kindle N-Gauge Japan Layouts with Trackplan (Some US Layouts as well)
bartmanDE posted a topic in Structures
Only for the German members (maybe other too, pls check by your own), there is now the opportunity ... "2 Monate Amazon Kindle Unlimited kostenlos testen" to gather via the Kindel and a free 2-month subscription KATO UNITRCK plans and layouts with detailed track plans Here is the list of the original eBook Japan layouts for KATO UNITRACK: Have Fun !
- 1 reply
-
- 2
-

-
- track plans
- layout
- (and 1 more)
-
I got a total of seven Kato 20-210 double crossover on my layout and I realized that I may be doing something wrong with those... Indeed, two of them have died unexpectedly. Considering m overall satisfaction with Kato Unitrack, I am assuming I am doing something wrong... What seems odd is the fact that these two crossovers died in a similar fashion: at some point, there seems to be a short circuit located in one of the four solenoids used for powering each turnouts. Because of these short circuits, other turnouts soon become unresponsive. How did I identify the issue and confirm the short circuit ? Once I realized my double crossover was not working properly (typically following an unexpected derailment !), I opened it and investigated each turnout separately. Removing the faulty solenoid allowed to restore proper operation of the crossover for the three other turnouts. How I typically use my crossovers... These double crossovers are used to connect two tracks that are each powered with a different control box. Before the second double crossover died, I had to use a hammer to nail something close (less than a meter) from it. However, though I realize the vibrations induced by the hammer may be detrimental, I don't see how they could lead to any short circuit in the solenoid... Have you experienced something similar ?
-
I just realized at some point Kato released N700sets (10-547) with an actual enclosed gangway between cars. I don't think I've seen this on anything else before and I'm curious if anyone has any experience with these sets. I assume they must not have worked too well since they don't appear on anything else but they look pretty cool when combined in a set.
-
Hi folks! 3 weeks ago I realized one of my dreams with my longtime partner. Trainsetter Ulli Liedtke & Natascha Drews GbR in Germany is now at the model train market. We will produce selected products for the N (1: 150 & 1: 160) and Z (1: 220) gauge in the future. Our first product, which we would like to introduce to you, is available soon in July 2019! The starter set "Hänschen" contains a catenary for the track system Kato Unitrack and Tomix Finetrack in gauge N. 2 pieces long wires for 280mm and 4 pieces short wires for 140mm mast spacing in 0.25mm stainless steel. Of course, the wires are thus suitable for curves, which can be tailored to suit his needs. "Hänschen" is only suitable for the indicated overhead line operation, which means that the pantograph must not touch the wire. Unfortunately we are not ready yet with a website! We are happy to answer your questions via trainsetter-gbr (at) gmx.net or on Facebook and Twitter. Whether in English or German, we will answer your questions. For mid-July, distribution via dealers is planned. Yours sincerely Ulli Liedtke Trainsetter Ulli Liedtke & Natascha Drews GbR email: trainsetter-gbr ( at ) gmx.net Flyer 2019.pdf
- 45 replies
-
- 12
-
-
- overheadwires
- kato
- (and 2 more)
-
Just got my tax return! Time to buy a new train. Which one would you guys go for?
-
Kato DCC Install on 800 Series Shinkansen and Sunrise Express
BulletTrain816 posted a topic in DCC, Electrical & Automation
I came home from Japan with a bunch of EM13 decoders and an 800 and Sunrise. The shopkeeper that I could install DCC on the trains and I presumed that it was a drop in EM13 like all the other trains. When I got home and opened it up I was met with a surprise which was that there was no drop in. Can I hardwire to EM13 to the pickups or do I need to get another decoder? -
Using the Tomix N-DU204-CL 5518 on Kato track
BulletTrain816 posted a topic in DCC, Electrical & Automation
I want to buy the Kato V13 and I was wondering if I could use the Tomix controller due to its double control capabilities. Is this possible and will I need an adapter if so which one? -
.thumb.jpg.c7e5c2d2c8b9bb9833da1dc5631a77c8.jpg)
Kato uses different engines for French and Japanese bullet trains - why ?
alain10025 posted a topic in General
Hi, In a previous post on this forum, I mentioned that the newly developed Kato slotless motor was not compatible with Kato French bullet trains (as well as other Kato European trains I bet but I did not confirm that yet). Here is a depiction of the Kato engine used in these trains. Yesterday, I opened my Kato JR700S Nozomi Shinkansen and realized that its engine was, contrary to that of the French TGV I have, the exact same dimension as the new Kato slotless motor (which is significantly smaller and slightly longer than the motor in the French TGV). I was able to replace the JR700S engine with a slotless motor, it now runs great and has a much better behaviour at low speed. One question though: why in the world would the engines in the Kato French bullet trains be so different from those in the Japanese bullet trains ?? -
Recently I've noticed, that the Kato Shinkansen 100 (10-354) was "missing" a pantograph on the lead car (see the pic). And I was wondering if that was prototypical... It just seems somewhat odd and awkward to have that empty space. I also found pictures of a Shinkansen 100, where this space was occupied by a pantograph, which makes me want to install one myself
-
Hello, I have been very enthusiastic about the new Kato slotless motor and I purchased a couple of them on Hobbysearch. More precisely, I ordered the Kato motor 11-503-A. Order was smooth and delivery prompt... But... I have a problem. Indeed, my initial plan was to use these slotless motors in some of my Kato trains, in particular for high speed trains such as, for instance the TGV 10-1529 (réseau duplex). After all, the product is advertised on the website as "This product is compatible with motors with flywheels.". However, after receiving the motors, I quickly realized they are slightly smaller than those in my TGVs... And I am left wondering what I can do with these motors... I feel a bit silly but I also believe somebody else could make the same mistake so I come here searching for confort / redemption and mostly ideas ! Thank you !
-
Hey guys, (Note: All the research outlined below is relatively crude, as i don´t know japanese and had to utilize google translate for most of this. It is likely that i just missed something because of that) I´ve recently been pondering on buying a Kato C57 1 to add to my fleet. This is why I´ve trying to figure out, if there are alternatives to couple 2 steam locomotives together, without using the kinda ugly and un-prototypical Kato tandem coupler, which attaches to the front bogie. And thus I´ve lost my mind and free-time to trying to figure this out... In a nutshell: I did find a way to couple 2 locomotives together in an elegant and prototypical looking fashion (link to this video by shigemon). And while I found, that using the Kato Z05-0746 coupler (originally Kato USA part 28-270) seems to be the most popular way of doing this mod, that exact part doesn´t seem to be available anywhere (quite a trend as we´ll see later). Admittedly, I couldn´t check Kato USA, as their parts-website is under maintenance and is thus not available. Doing more research, I found that this mod is possible with other couplers (yay!). As seen here (video by ゆかり) and here (video by でんきちくらぶ) the mod is possible with Greenmax, other Kato (Z01-0239) and even Micro-Train couplers (though MT couplers seem to require heavy modification to the body, which I don´t want to do). However, once again, both Kato and Greenmax couplers are once again seemingly sold out everywhere. This is where my questions come in: As an "alternative" I did manage to find Kato 28-235. While it does mostly contain stuff irrelevant to the topic at hand, it does seem to contain the Z01-0239 couplers I was looking for. Could anyone perhaps confirm this? I haven´t been able to find any information on the exact contents of this parts bag. I also noticed how similar the greenmax couplers and the Kato 28-187 / 28-188 couplers, so could you perhaps use these as replacements? Shigemon also mentioned, that you could modify z-scale couplers, does anyone know which one he meant? I personally couldn´t find any info on that front... I was also wondering, if there was a way to utilize any other type of coupler (preferably Kato), so any info on that would be appreciated Generally, any info on this topic would be appreciated. I haven´t been able to find a single piece information in english, which is why i am making this post Thanks in advance
-
I have been looking for a comparison between Kato Eurostars 10-327 and 10-1295... I recently found a - brand new - set of extra passenger cars for Kato 10-327 (ref. 10-328) and I am wondering if it is compatible with the more recent set 10-1295. Would you happen to know this ?
-
Hi, I have a couple of Kato steam locomotives (Hitoyoshi, C62-Tokaido and D51-498). I noticed on the forum that some people seem to have issues with certain models derailing often. From my experience, I mostly have issues with the D51-498 with the last set of wheels (see picture below) that tends to "jump" left or right, particularly on turnouts. However, I do not see any way to fix this issue since there does not seem to be any screw to shift the position of these wheels or the stiffness of their connection to the locomotive... Did anyone encounter such issue and find a way to fix it ? Thank you ! Alain
-
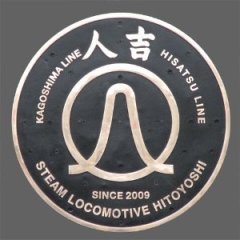
My local Kumamoto hobby shop has disclosed to me that KATO intends to produce the SL Hitoyoshi (as well as SL Aso Boy while they're at it) in N gauge during 2022. I trust their word as since they're long-time KATO dealers for several decades now, and I'm a frequent customer of theirs. It makes sense considering the number of JR Kyushu trains and locomotives they've made so far, never mind the Tohoku-region (2028-1) 8620. I'm hopping we'll all see it as a Planned Product in the soon-to-be-released 2022 catalog. I really like their JR Kyushu DE10. This is the video from which I originally learned of the SL Hitoyoshi, way back before I came here. It immediately became my favorite train in Japan.
- 12 replies
-
- 2
-
-
- jr kyushu
- steam locomotive
- (and 1 more)
-
Hey guys, So, after a few months of planning and thinking, it's finally time to start building this baby! Tomorrow I'll go buy all the material needed for the wooden base and in the weekend I'll start building it. This is the final layout: Since it will go into my living room, and it will be 2.40m long, it will be divided in two parts, almost in the middle, so it will be easier to handle. The base will be of plywood, 1.5cm thick, reinforced with 3x2cm frames. Since the forniture has a Wenge-like color, I'll paint the whole base of a dark color. From below, it should be something like this: The two 45 degrees corners in the front are due to the fact that the 70cm deep base will go against a 60cm deep cabinet, so I'll to cut it in order to avoid hitting my leg every time I walk by. It will go here, below the TV, on an IKEA Besta bench : The TV will limit the space above, I'll have around 30cm to play with, but it should be enough. I'll make videos detailing all the process, which will involve a lot of trials and errors I'm sure, as this is my first build, but that's the fun part! Here's the introduction video:
- 25 replies
-
- 6
-
-
- tokyo
- tokyo station
- (and 3 more)
-
Hi! I’m wondering if the Kato 10-354 takes an EM-13 and FL-12? Thanks!
-
My 3 level railway - Japanese N gauge, British OO, and Lego
drt7uk posted a topic in Layout Building
Hi folks, I've spent about 4 months building a 3 level layout for my British OO, Japanese N and Lego and it's finally finished*. Hope you like the video. https://youtu.be/Nr3axLF001Q Feel like I have an encyclopedic knowledge of how to build a layout in a shed now, from insulation to wiring etc to the removeable bridge for the door, so if anyone has any questions happy to advise. Bridge has copper strips underneath to keep the connection, and is lifted up to leave the room, with a section of the scenery swinging open. Need to step over the Japanese one to leave which is a bit tricky but there's a handlebar on the outside to help. None of it is digital - Gaugemaster and Kato controllers respectively but with the Hornby HMDC app to control the two branch lines. Lego is battery powered, remote control. Shed is well insulated, have a heater and a dehumidifier in there. Layout is 6m x 2.5m so plenty of space for nice long platforms! *Lots of little details to add to the British one from signals to passenger bridges to station names etc but the laborious work is finally over, now on to the fun stuff: running trains and adding little details. Going to landscape the temple area with static grass, paths and lakes too. -
The train in question is an E231-500 series motor car which is at least 4 years of age, and has a (I think) 3-pole motor with flywheels on either side. Normally (as everyone who models knows lol) when the power is turned to moderate speed on the powerpack (mine is a Kato standard S) the motor begins to operate and the head/taillights on either side of the train light up. However, this time when the motor car is placed on the track, the head and taillights of the leading cars flicker off, the motor car does not move and a slight odour of electrical burn is emitted from the powerpack vent. If I turn the speed all the way up on the powerpack, the green power lamp on the powerpack turns off with a click (then I push the re-start button) and the controller returns to normal. I suspect that there is a short circuit in the motor (all the bogies and copper plates on the motor car are touching in normal position) but I do not know where. Does anyone have solutions to the problem?


.thumb.jpeg.6748a14229396c0abc511f0dbda369c0.jpeg)