railsquid Posted February 3, 2016 Author Share Posted February 3, 2016 Helps when you live on top of the prototype ;). I've been spending the last few weeks staring at road markings, crossing barriers, lineside equipment, utility poles etc. (as well as investigating traffic light arrangements for crossroads straddling a level crossing). For the record this short stretch of the road will eventually turn (behind the camera) turn sharply and go up a steep hill. When I get that far. Link to comment
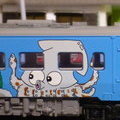
railsquid Posted February 6, 2016 Author Share Posted February 6, 2016 The small ramshackle locomotive shed has finally been decorated with Japan's national slogan. 7 Link to comment
JR 500系 Posted February 7, 2016 Share Posted February 7, 2016 Those wordings look nice! Are they printed (custom made) or did they come with a decal sheet for the shed? :) Link to comment
railsquid Posted February 7, 2016 Author Share Posted February 7, 2016 Those wordings look nice! Are they printed (custom made) or did they come with a decal sheet for the shed? :) They came from another Tomytec building kit; I just stuck them on some 0.3mm plastic sheet before cutting them out and sticking them to the shed. That's one of the nice things about Tomytec kits in particular, they come with a bunch of extra decals and parts which can be used "creatively" :) 1 Link to comment
Sean Posted February 12, 2016 Share Posted February 12, 2016 Just went through the thread to see what you`ve been up to for the past year and it looks great! 1 Link to comment
railsquid Posted February 20, 2016 Author Share Posted February 20, 2016 While tidying up I found a bunch of trees I'd forgotten about, which very nicely disguise the shelf support in the corner. \ Close up they do look a bit naff, but from a distance (and that's pretty much the only way to view that corner) they look fine and even help the two backscenes (from completely different locations) blend together. 4 Link to comment
splifdfx Posted February 20, 2016 Share Posted February 20, 2016 Close up they do look a bit naff, but from a distance (and that's pretty much the only way to view that corner) they look fine and even help the two backscenes (from completely different locations) blend together. I didn't see the shelf support at first, but was amazed at how it indeed nicely blends with the backscenes. Looks good ! Link to comment
railsquid Posted February 22, 2016 Author Share Posted February 22, 2016 (edited) Edited February 22, 2016 by railsquid 8 Link to comment
Densha Posted February 22, 2016 Share Posted February 22, 2016 Do I see it correctly that you have a track leading to the depths of Floor Gorge? 1 Link to comment
railsquid Posted February 23, 2016 Author Share Posted February 23, 2016 Ah, so that's why I keep losing trains! Link to comment
JR 500系 Posted February 23, 2016 Share Posted February 23, 2016 That's a great perspective, especially the view of the train garage! Great camera by the way! Link to comment
railsquid Posted February 23, 2016 Author Share Posted February 23, 2016 Thought that might be interesting, as it's illuminated and Tomytec went to the trouble of decorating the inside. The camera isn't bad for the price, but the lense is skewed so you have to mount it at an angle. I also found out the video editing software can crop the picture, which helps remove part of the view of the shelving, and puts it into a better aspect ratio (must experiment more). Link to comment
railsquid Posted February 24, 2016 Author Share Posted February 24, 2016 Ladies and Gentlemen... I present you a self-referential backscene... One of those houses is Chez Squid, containing this layout. So if you had CSI-style zoom capability, you could zoom in and see the layout, then zoom in on the backscene, and so on ad-infinitum. There's an apartment block going up not so far away, and evidently they sent up a drone or something to photograph the prospective view from the upper storeys, which they put in a leaflet they've been spamming the neigbourhood with, which happened to include - if you know where to look - my very own domicile. I've literally just cut out the picture and stuck it on, but I'll scan it in and merge it into the existing backscene image better. 2 Link to comment
cteno4 Posted February 24, 2016 Share Posted February 24, 2016 You need your own drone squid! Jeff Link to comment
railsquid Posted February 26, 2016 Author Share Posted February 26, 2016 OK, it's just a streetlamp, but it means I finally got round to installing it (a messy process involving blobs of solder and repurposed rails). More to follow... 2 Link to comment
cteno4 Posted February 26, 2016 Share Posted February 26, 2016 There is a new technical term to use "squid terminal blocks" Jeff Link to comment
railsquid Posted February 27, 2016 Author Share Posted February 27, 2016 (edited) The "classic" terminal blocks don't seem to be available here, the closest I've found are some for higher voltages which you can't cut apart, and other fancy-looking but expensive/impractical products. Still, good soldering practice. Meanwhile, tools gibbered and wood cringed, for RailSquid is in full-on bodge mode, hijacking the unused main layout boards as a temporary cutting bench. I wonder what it will turn out to be? Edited February 27, 2016 by railsquid Link to comment
beakaboy Posted February 27, 2016 Share Posted February 27, 2016 The "classic" terminal blocks don't seem to be available here, the closest I've found are some for higher voltages which you can't cut apart, and other fancy-looking but expensive/impractical products. Still, good soldering practice. Meanwhile, tools gibbered and wood cringed, for RailSquid is in full-on bodge mode, hijacking the unused main layout boards as a temporary cutting bench. I wonder what it will turn out to be? Control Panel??? Link to comment
railsquid Posted February 27, 2016 Author Share Posted February 27, 2016 Give that man a senbei! While the glue is drying, I took part of the road out for a change of scenery. However the "no parking" sign has not dissuaded the removals van from parking where it wants to. 6 Link to comment
JR 500系 Posted February 28, 2016 Share Posted February 28, 2016 You need a traffic police warden to give a parking ticket to that Sakei truck! 1 Link to comment
railsquid Posted March 5, 2016 Author Share Posted March 5, 2016 The control panel emerges from a pile of scrap wood... people with actual woodworking and electronics skills should look away. 1 Link to comment
beakaboy Posted March 5, 2016 Share Posted March 5, 2016 looking good. Just make sure you leave enough room around your switches for the underneath part when switches are close to each other (been there, done that) Link to comment
railsquid Posted March 5, 2016 Author Share Posted March 5, 2016 There should be enough space, though no doubt I will find out sooner or later what fundamental booboo I've made. Now to remember which wires power which section and replace this with something a little more conventional. Link to comment
JR 500系 Posted March 5, 2016 Share Posted March 5, 2016 There should be enough space, though no doubt I will find out sooner or later what fundamental booboo I've made. Now to remember which wires power which section and replace this with something a little more conventional. Sorry but I couldn't understand about this... What exactly does this do? Looks interesting... Link to comment
railsquid Posted March 5, 2016 Author Share Posted March 5, 2016 I've divided the layout into a number of isolated sections so I can park more than one train on the same stretch of track. However I didn't have time to build the control panel with the switches, so soldered all the section wires to a convenient connector, a spare piece of track... Ultimately each of those red wires will be connected to a switch. Link to comment
Recommended Posts
Create an account or sign in to comment
You need to be a member in order to leave a comment
Create an account
Sign up for a new account in our community. It's easy!
Register a new accountSign in
Already have an account? Sign in here.
Sign In Now