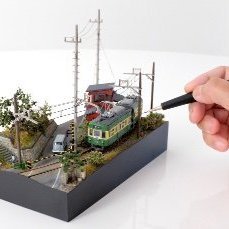
mags_minibuilds Posted September 9, 2023 Author Share Posted September 9, 2023 Great tips and tricks, thanks Jeff! Link to comment
cteno4 Posted September 11, 2023 Share Posted September 11, 2023 Might also try some of the non lead solder pastes. These are applied with a syringe and needle to where you want the solder then hold the tip to it. It’s small particles of solder and flux paste mixed together. Some are also low temperature which helps you solder something next to an already soldered thing and not melt its solder joint. Like $10-15 for a small tube, don’t need a lot. It’s used a lot for small electronics circuit repairs and also in small solders in jewelry. I’ve used plain old tin lead solder paste and it works well. Added benefit you have a hand free not having to hold solder and also have less solder spill into your joint. You can paint it on one side of a joint and apply heat to the other side to help have the solder not wick onto the tip too much. cheers, jeff 1 Link to comment
mags_minibuilds Posted September 11, 2023 Author Share Posted September 11, 2023 (edited) Over the weekend, I was watching a bunch of YouTube videos again about soldering photo etch. Interestingly, I came across this video that used Nokorode paste flux. Have you tried Nokorode? I printed this out to put on my desk to refer to when I'm soldering. I also ordered the H&N #30 liquid flux and it's coming in the mail tomorrow. I'm assuming the liquid flux flows and seeps into the crevices that's why it's being used? How do you differentiate when to use liquid and when to use the paste? Would the example below work with liquid flux too and it's just a matter of preference? I watched a ton of Japanese brass kit builders and they mainly use the liquid type, I hardly see them using pastes. Edited September 11, 2023 by mags_minibuilds Link to comment
cteno4 Posted September 11, 2023 Share Posted September 11, 2023 Well paste you can control where the flux is, liquid can wick to a larger surface and where the flux goes the solder can follow. You are correct the liquid is good at seeping in little gaps. I use the liquid a lot when soldering on plugs and such to wire as once the plug is crimped the liquid seeps in welk around the wire and crimp and solder wicks in really well. the method shown is to place small shaves of solder the solder paste is a mix of ground solder and paste flux. Thus it localized where the solder and flux is greatly and controls the amount of solder in a place, but requires a bit more careful placement of the heat. Easier than the above application of flux paste and bits of solder. one of the big used of solder paste is to solder tiny surface Mount devices (smd) components onto a pc board. Paste is applied to the pc board contacts and components placed into place and then it’s baked until the solder flows and pulled out of the oven. But you can do the same thing hitting the solder paste with a soldering iron tip. Jeff Link to comment
mags_minibuilds Posted September 13, 2023 Author Share Posted September 13, 2023 An update...the new rosin core lead-free solder and the H&N Flux #30 came on Monday. I tested various soldering iron temp between 350-400C but the solder wasn't melting that well, 410C seems like the magic number (for now, at least). To my surprise, I had better results with using more flux than I would've thought. This photo shows the "testing" I did which I had a difficult time before soldering two big pieces together. It's much smoother and the solder melted like butter in between all the crevices instead of just sitting on top of the pieces, no chunky globs. I tried tinning both pieces and heating it up to stick them together, but it didn't work out for me. I didn't like that the solder creates a slight raised bump so it's hard to align the two pieces and my iron didn't want to melt the solder between those pieces. I was able to drag the melted solder into the joints, I have to make sure the conical tip is on a slant so it heats up the area better/faster. I really paid attention to where the iron tip is heating the area this time. A little step forward... 1 Link to comment
cteno4 Posted September 14, 2023 Share Posted September 14, 2023 Hey great progress! Yes flux is your friend! Without it solder will just ball up on the surface. for fusing pretinned pieces you need to use a goat face tip (I have one sort of a cut off cone tip) and crank the heat up a bit more. Yes they don’t sit flat but having tweezers on it you can quickly align once solder has melted. Also dash of flux as always. Other option is try the flux paste and heat. as I keep repeating, soldering like this is practice, practice, practice. jeff 1 Link to comment
mags_minibuilds Posted September 14, 2023 Author Share Posted September 14, 2023 Not only did I poorly solder the bottom plate together which formed those chunky globs in the previous kit, I had just realized I was supposed to apply solder into the holes. Good thing no one is going to see underneath the cars. I’m so glad I’m practicing. This was the last ARU kit…is it time for the World Kougei ones or procure more ARU kits and keep practicing? 🤔 Link to comment
Martijn Meerts Posted September 14, 2023 Share Posted September 14, 2023 I was out of town for a few days, so I didn't have the ability to follow up on this 🙂 I think kit #2 is looking good, and you should be able to pick up one of the easier World Kougei kits. Something to keep in mind is that ARU kits are, I believe, designed so they can be glued together as well. So some of the brass might be a bit thicker compared to World Kougei kits. Thicker brass will of course take more time to heat up. Also, a lot of the World Kougei kits use nickel silver for the frame, especially the loco kits do that. Nickel silver is easier to solder than brass, so if you have a kit with nicker silver sheets, you could start with those. And, like Jeff said, soldering is definitely a question of practicing, and getting comfortable with the tools. It took me a lot more kits to get soldered bits to look as decent as yours are already looking. I destroyed quite a few files cleaning up my early solder joints 😄 1 1 Link to comment
mags_minibuilds Posted September 14, 2023 Author Share Posted September 14, 2023 Thanks @Martijn Meerts The ARU kits does have quite thick brass compared to World Kougei. I opened the Porter steamer and glanced at the instructions, there's some nickel sheets. The most daunting part is the motorized chassis 😰 Reminder to self, I'll start with 370-380C instead of going straight to 410C. What type of epoxy do you use for white metal and gluing on the small parts? Link to comment
mags_minibuilds Posted September 14, 2023 Author Share Posted September 14, 2023 Question, what is the equivalent temperature for these soldering irons in 40W and 60W? I see them being used for these kits a lot in the blogs and wondering what temps they’ve been using. https://www.imon.co.jp/webshop/product/5696 Hakko Junior #325 https://www.hakko.com/english/products/hakko_junior_spec.html Link to comment
Andrew Nummelin Posted September 14, 2023 Share Posted September 14, 2023 For those who want to learn a little bit more there is a collection of good articles here: https://www.missendenrailwaymodellers.org.uk/index.php/tips-tricks-techniques/ 1 1 Link to comment
cteno4 Posted September 14, 2023 Share Posted September 14, 2023 Nice set of articles Andrew, thanks. I liked the cleaning one as it reminded me that brass can look clean but until you really clean it you may not notice how much tarnish there may be on it! I’ve never used an abrasive polish like that, I do like the matte finish it leaves for painting as that always an issue with brass. jeff 1 Link to comment
cteno4 Posted September 14, 2023 Share Posted September 14, 2023 Mags, temperature will need to be cranked up some when the tip is not right on the solder area as the metal will suck the heat fast. As martijn noted thicker sheets will suck more heat. Turning the temp up a bit is a cheat if you have a lower wattage iron. Higher wattage soldering irons are also going to be a help as they will have more power to pump in more heat faster when metal is sucking heat out of the tip. Most regular soldering irons are made for electronics and light wiring soldering, so not super high wattage. Mine is a 75w and is pretty good at maintaining temperature when I put it on a sheet of brass. One of the reasons I upgraded it a few years back as the old one was a 40w and a bit slower to heat up and also maintain temp. if you really get into these kits there are also resistance soldering machines as well. These are pricier starting at a couple hundred dollars. They pass a current through two tips you place on either side of the solder area and the current passing through the metal between the tips heats the metal up very fast and very localized. But it’s fiddly and expensive, but effective. another option is to just get a couple of sheets of brass and hack them up and do the same solder joints of the same type and size at some different temperatures to dial in what works best for you as well as just practicing more. Problem with experimenting with a kit is most all the solder joints are different and thus too many variables to start out with. I know your frustration with looking around for specifics in soldering stuff, folks don’t tend to list their temps and such. Part of this I think is that many have not tried to work out carefully the temps they use and most irons are not well calibrated at all so bit of apples and oranges. cheers jeff 1 Link to comment
Martijn Meerts Posted September 15, 2023 Share Posted September 15, 2023 14 hours ago, mags_minibuilds said: Thanks @Martijn Meerts The ARU kits does have quite thick brass compared to World Kougei. I opened the Porter steamer and glanced at the instructions, there's some nickel sheets. The most daunting part is the motorized chassis 😰 Reminder to self, I'll start with 370-380C instead of going straight to 410C. What type of epoxy do you use for white metal and gluing on the small parts? The motorized chassis is actually not all that bad, but the World Kougei instructions makes things look more complicated 🙂 I tend to use 350C for pretty much all my kit soldering. For my soldering station that works well. With regards to the question on wattage, it doesn't do much for the temperature as such, it just means the tip reaches the temperature faster. Higher wattage also makes sure the tip doesn't cool down as much / fast when touching the cold brass sheet. For example, my soldering station has 2 outputs, both are 40 Watt. However, because I use very small tips, they heat up really fast, and maintain the heat really well. Interestingly, my soldering station is actually a professional desoldering / rework station for electronics (Weller WD2000M), but I've been using it for pretty much everything soldering wise, and it works really well. For epoxy, I use a standard 2 component epoxy, nothing to special about it. 1 Link to comment
mags_minibuilds Posted September 18, 2023 Author Share Posted September 18, 2023 I've officially started my first World Kougei kit...this tiny Porter locomotive is what kickstarted this brass kit craze. I started by sorting and counting out all the small parts. Everything seems included plus a few extra parts. Martijn was right about the nickel sheet is easier to solder as I only needed to set the soldering iron at 370C and it tinned nicely even with my lead-free solder. I'm working on the chassis first so I assembled the gear housing frame and primed it with Tamiya Fine Surface Primer (Light Gray), will paint it black tomorrow if time permits. ...an early Christmas present came today, a mini toolmaker's vise, right out of the box it operated very smoothly and opened/closed parallel. The other vise I have is a huge bench vise which is an overkill and might crush the parts. 4 Link to comment
mags_minibuilds Posted September 27, 2023 Author Share Posted September 27, 2023 (edited) Another update…there’s a few notes I wanted to share through my journey of assembling my first World Kougei kit. I had accidentally mixed the gear shaft and the shaft that holds the two halves together. I had organized them and made note of it. However, I think as I was assembling/disassembling things, I took the wrong parts. So I had to take it apart after I put Threadlocker on. So there was quite a struggle with that almost to the point where I would break something. I was extra careful while bending the parts, making sure they are at 90 degrees and such but I realized later on that things still came out a smidge lopsided. Not horrible, but the perfectionist in me knows it’s there, at least when you’re not on eye level you won’t notice it that much. Quartering the wheels and putting the rods together was’t bad, it took a couple tries and one wheel cover became a casualty (luckily they gave me an extra piece). I was surprised the wheels went onto the shaft pretty easily with my finger pressure. I was able to take off the wheels with my fingers, which I thought was odd since the instruction warns that once the wheels are on, it’s pretty much not coming off without a proper tool. I had my vice but it seems like an overkill, but maybe other kits it’s harder to press fit. The motorized chassis runs better than it sounds (edit: some of the vibration noise in the video was from the cab shell not screwed on tight enough). The gear shafts has been oiled with Labelle 108 and the wormgear greased with Labelle 106. I’m not going to try to fix it or else there's a chance I might mess it up. I'm just grateful it runs and goes forward and backwards when I tell it to. Run test: Running on tight curves: The only parts I have left are the boiler details and painting...whew, the hard part is done. I might wait a little before I paint, I kind of like to look at the brass engine for a little bit. Edited September 28, 2023 by mags_minibuilds 3 Link to comment
cteno4 Posted September 28, 2023 Share Posted September 28, 2023 Mags, Excellent work! Kudos! Makes me want one but I will not add a new scale. I will not add a new scale. I will not add a new scale… jeff 1 1 Link to comment
Martijn Meerts Posted September 28, 2023 Share Posted September 28, 2023 It's looking and running really good! As for it being lopsided a bit, a lot of the prototype narrow gauge stuff is also lopsided, so it's not like it's incorrect 😄 With regard to the wheels going on the axles easily, I've had both situations. Some kits they go on easy, some kits you really do need a vice and they're not coming off again without violence. If you feel they're too loose, you can always add a drop of superglue once you're certain they're in gauge. 1 Link to comment
mags_minibuilds Posted September 28, 2023 Author Share Posted September 28, 2023 Martijn, have you encountered situations where the instructions doesn't ask for that hole to be tapped but it only makes sense that it does or else the parts won't hold together? I've had that happen once already and there's another one in question. There's a hole in a thin metal sheet of the boiler that uses a M2.0 screw, I can try using a little more pressure to screw it in but I'm afraid of stripping the hole/screw. I'm so glad this kit's wheels were so easy to take off or my project would become in the scrap yard. I had to take the wheels off to fix the shaft problem. Do you have suggestions on what tool to use to cut the metal weights? Dremel or hacksaw? Thank you for all the help! Link to comment
Martijn Meerts Posted September 28, 2023 Share Posted September 28, 2023 Where ever you need a screw, you will always want to tap the hole first, otherwise there's a high likelihood of damaging either the brass or the screw. However, first check if don't have a sort of bushing/ring with thread already tapped in it. With most of the kits I have, there's a small bushing/ring that needs to be soldered on the inside of the boiler, and that's where the screw will go. It's not really clear in the image if there is such a part or not. As an example, this is the part on my Kiso Forest Baldwin kit (goes in the bottom of the boiler, right below the smoke stack/chimney): If such a part isn't included, I would carefully tap the boiler. For the weights, they're fairly soft metal, so a decent little metal saw should make quick work of it without making a total mess. I have to say, I've not had the need to cut down any weights yet, but on the other hand, I've also not really finished any of the kits 😄 Link to comment
mags_minibuilds Posted September 28, 2023 Author Share Posted September 28, 2023 Thanks Martijn! Ahh, thanks for the tip. I triple-checked the instructions and cross referenced all the parts, I don't see a bushing...tapping it is! Link to comment
mags_minibuilds Posted September 30, 2023 Author Share Posted September 30, 2023 Boiler details are complete but I left this top boiler piece removeable because I am torn on what I should do when I decide I am read to paint it... 1. Paint the top boiler part separate from the rest and then use epoxy to fix it to the boiler or 2. Solder it first to the boiler and paint it as a whole? My intuition is to solder the parts together and paint them in one piece but will the paint get into the nooks and crannies? Does it matter since you can't see much in there anyways? The chimney cap and whistle are also not adhered as they are going to stay brass color, those are propped on there for photo purposes. 6 Link to comment
cteno4 Posted September 30, 2023 Share Posted September 30, 2023 Sorry, have to say it, so cute! jeff 1 Link to comment
Andrew Nummelin Posted September 30, 2023 Share Posted September 30, 2023 On 9/28/2023 at 4:33 PM, mags_minibuilds said: Thanks Martijn! Ahh, thanks for the tip. I triple-checked the instructions and cross referenced all the parts, I don't see a bushing...tapping it is! Just use a nut. Tapped thin sheet metal won’t last - compare the thickness to the pitch of the screw. I think painting individual parts before assembly is best whenever feasible - the front of the cab, back of the tank will be a challenge otherwise. It’s a lovely looking little model. 1 Link to comment
mags_minibuilds Posted September 30, 2023 Author Share Posted September 30, 2023 (edited) A question about "morning glory" (?) couplers... The Porter kit came with some dummy couplers and I'm assuming it's not for actual use. I unintentionally ordered extra pairs of the ARU couplers and I'm thinking about using them for this Porter engine. Is there any other manufacturer that makes these couplers that are more suitable or any type would pretty much do? I found this photo of way back in the day of this little engine in action. Edited September 30, 2023 by mags_minibuilds 1 Link to comment
Recommended Posts
Create an account or sign in to comment
You need to be a member in order to leave a comment
Create an account
Sign up for a new account in our community. It's easy!
Register a new accountSign in
Already have an account? Sign in here.
Sign In Now