mags_minibuilds Posted May 28, 2023 Share Posted May 28, 2023 I'm interested in purchasing a 1/87 9mm narrow gauge loco but wondering how difficult is it to build one of these kits? The motorized chassis also needs to be put together. Attached is a sample of what the instructions looks like. It seems a little daunting for me so I was wondering if I'm a little over my head on this. Is it better to just go with the 3D resin printed models on Shapeways and buy a pre-built motorized chassis. https://www.1999.co.jp/eng/image/10467480 2 Link to comment
mags_minibuilds Posted May 29, 2023 Author Share Posted May 29, 2023 (edited) I was researching some more and found this article written by the admin, Martijn Meerts. I wonder if he finished it yet and his final thoughts are. https://jr-chiisai.net/tag/world-kougei/ Edited May 29, 2023 by ZandT Link to comment
bill937ca Posted May 29, 2023 Share Posted May 29, 2023 (edited) There are illustrated articles on assembling World Kougei kits here: http://www5a.biglobe.ne.jp/~toyoyasu/handycrafts.htm I don't see your exact kit listed, but there are many choices. Google translate is your friend. Edited May 30, 2023 by bill937ca 2 Link to comment
mags_minibuilds Posted May 29, 2023 Author Share Posted May 29, 2023 Thanks @bill937ca, that's quite a wealth of information, extremely useful! 1 Link to comment
Martijn Meerts Posted May 31, 2023 Share Posted May 31, 2023 On 5/29/2023 at 3:43 PM, ZandT said: I was researching some more and found this article written by the admin, Martijn Meerts. I wonder if he finished it yet and his final thoughts are. https://jr-chiisai.net/tag/world-kougei/ Late reply, life is still keeping me busy 🙂 I did more or less finish the Hokutan #2 kit yes, just the shell still needs painting and then some interior detailing. The Hokutan #2 is a 1/87 12mm kit though, not a narrow gauge 1/87 9mm kit, so it's actually a bit more complicated than most narrow gauge kits. I still have a few partially built and totally un-built kits (some N scale, some H0e (1/87 9mm), some H0j (1/87 12mm). I'm by no means an expert on these things, but I should be able to help with any questions. I could possibly also do a bit of an introductory write up on some basics, maybe with some example pictures and tools I use. 2 Link to comment
mags_minibuilds Posted August 28, 2023 Author Share Posted August 28, 2023 I have jumped onto the brass kits bandwagon. Martijn has given me a lot of advice, encouragement and motivation for the past couple months. On my trip to Japan in June, I brought back a couple World Kougei & Aru Model kits and a bunch of tools. The first one I started with is the Aru Model forest diesel locomotive. There weren't many parts nor much soldering needed but it was enough to get me started and testing the solder/flux and painting techniques. It uses a Kato B-Train Shorty motorized chassis. The kit has a brass shell and white metal front/back plates. I prepped the brass shell for painting using a combination of 600 grit sandpaper, #0000 steel wool, and a steel scratch brush. Then I used 99% isopropyl alcohol to clean everything down. I sprayed several coats of Tamiya Fine Surface Primer. After letting it dry for one day, I airbrushed the cream color using Vallejo Model Color: 15 drops of Ivory and 1 drop of Light Yellow. I have an inexpensive portable airbrush which is great for this kind of painting. I can't imagine hand brushing the paint, I would do a horrible job and it'll never look smooth. I used Tamiya spray cans of flat black and semi-gloss clear on the couplers, headlights and underfloor tank. After letting it dry for 2 days, I used Tamiya masking tape (de-tacked on the underside of my arm) for the part I wanted to leave as cream color and applied the 2nd color: maroon. Which was a mixture of 20 drops of Flat Red and 8 drops of Hull Red. I was thrilled that the paint didn't peel off once I removed the tape. However, when I took off the masking tape, there was some paint bleed. To clean it up a bit, I carefully tried using a modeler's knife, fine sandpaper to remove the maroon paint but not enough to scrape off the cream paint. The sanding needle was too abrasive and not delicate enough for tight areas. Hand painted the silver trim with Tamiya Chrome paint. There were a couple things I wish I would've done better. Like filling in some gaps between the middle shell and the front plates. And sanding the extra weirdness in the white metal molding. I’m telling myself this is a practice piece and I can live with it. The final step is to glue the windows, headlights and the underfloor tank and spray clear coat. Will post photos the final results when done. 11 Link to comment
cteno4 Posted August 28, 2023 Share Posted August 28, 2023 @mags_minibuilds kudos! Excellent work and great to try everything out on the simple arunine model. Thanks for documenting all this. cheers jeff 1 Link to comment
bc6 Posted August 28, 2023 Share Posted August 28, 2023 Very nice, Ive been looking at possibly doing a simple brass kit some day, Do you have pics of the model with the chassis installed? Link to comment
mags_minibuilds Posted August 29, 2023 Author Share Posted August 29, 2023 @bc6 Here’s a link from the manufacturer’s site: http://arumo.a.la9.jp/r0034.htm 1 Link to comment
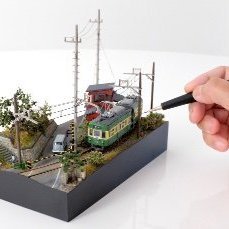
mags_minibuilds Posted August 29, 2023 Author Share Posted August 29, 2023 I just received a shipment from RG Rokko. I am so grateful for Masaharu-san for helping me procure these two little speeders (cute and small things are my obsession). Phenomenal communication and service! Adding to my stockpile of Echo Model HO diorama parts. 2 Link to comment
mags_minibuilds Posted September 1, 2023 Author Share Posted September 1, 2023 Here it is. I sprayed semi-gloss clear coat and attached all the windows, headlights and chassis. 6 Link to comment
cteno4 Posted September 2, 2023 Share Posted September 2, 2023 She’s a beaut mags! Details came through the paint nicely. Mask lines all nice and crisp. Great job. jeff 1 Link to comment
mags_minibuilds Posted September 2, 2023 Author Share Posted September 2, 2023 Thank you Jeff! There was a mishap during the assembly...I accidentally dropped the shell onto the floor (!), luckily it only nicked some paint off the bottom 2 corners but I was able to touch it up. Quite a few lessons learned from this so-called "easy" kit! I forgot to mention this is an H0 narrow diesel locomotive, please excuse the n-scale buildings in the background. Eventually I'll start building a proper forest layout after I build a couple more locomotives and freight/logging cars. 1 Link to comment
Martijn Meerts Posted September 5, 2023 Share Posted September 5, 2023 Looks really good, the colours came out really well. Maybe I should continue with my kits as well 😄 1 Link to comment
mags_minibuilds Posted September 8, 2023 Author Share Posted September 8, 2023 So a little update on my soldering situation. My 8-year old generic brand soldering station that I got from Amazon decided to give me an error code, sometimes the error displays and sometimes it doesn't. I figured it's time to let it go and get a new one. I didn't want to deal with the downtime so I drove a total of 70 miles to Hakko America to pick up the FX-888D soldering station because no store locally carries it. I managed to solder the tiny details on the side of the car but it took a lot of filing and using a steel scratch brush to get some of the solder out of the grooves. I tested the soldering on the scraps that came with the same brass sheet and my practice pieces soldered so well together but not when I'm soldering the actual pieces. Maybe it's the placement of the pieces, pieces are getting too dirty, or I'm not heating the correct area for the solder to flow...still a lot more practice needed. Thinking that I've got the hang of soldering, I went on soldering the bottom plate and here's where it all went downhill really fast. I just needed to tack the solder on so the pieces hold but I somehow added more solder to it thinking it would flow better but that's how I got this big globby mess and the soldering iron doesn't want to melt that heap of solder. Using the same flux, solder and setup, I went on to solder the tabs and it went fine, as shown here. I find it easier to solder the 90 degree joints than to solder two pieces of something together, flat (does that make sense?). It doesn't help that I've chosen to use lead-free solder, which has a higher melting point (I tend to use temps between 370-400 celsius) and more difficult to use. So I ordered some rosin core lead-free solder and I'm going to test if that's better. I'm determined to make this lead-free solder situation work. While I'm waiting for more soldering supplies, I'll start filing down that solder glob. 2 Link to comment
Martijn Meerts Posted September 8, 2023 Share Posted September 8, 2023 All of this sounds familiar 🙂 For the grooves, just use very little flux and very little solder. If it still flows into the grooves, you could try filling the groove with a little bit of paper for example. For soldering 2 larger parts flat on top of eachother, that generally takes more time to start flowing. More solder is usually not the solution to anything that has to do with soldering, always try to use as little as possible. To keep these larger bits in place, it's possible to use some small metal clamps, or even Tamiya masking tape, it's quite resistant to heat it seems. In the end though, there will always be some things that don't look quite like you want. Your first kits look a lot better than my first attempts already, so I'm sure this one will together just fine in the end. And of things really should fail to the point where it's not usable anymore, they function great as static scenery pieces too! 1 Link to comment
mags_minibuilds Posted September 8, 2023 Author Share Posted September 8, 2023 Thanks @Martijn Meerts, I will try what you’ve suggested. In the beginning before that huge glob, I had used a little amount of solder and it would just sizzle and a piece just sticks to wherever my iron tip is pointing, not flowing or melting (cold solder joint?). The lead-free solder doesn’t like to tin the tip like the 60/40 solder does so I think sometimes the tip is not taking the solder (solder beads up). I’ll try again to make sure my tip is clean and tinned properly before each solder. In the back of my head I’m also wondering if my flux is working properly. Since I’m working with higher temps, my liquid flux seems like it’s drying out once my iron is getting close. Or the flux is penetrated inside the joints but I just don’t see it? There’s so many variables involved, but bottom line is I need more practice for sure. Link to comment
cteno4 Posted September 8, 2023 Share Posted September 8, 2023 Nice Hakko! I got the 951 a couple of years ago on a splurge as I too had always had generic ones and I could not locate new tips that fit the last one. I like the swappable tips/elements of the hakko as well. I would suggest going to a tin/lead solder, I’ve never had great luck with the non lead solders. Are you worried about the lead for health reasons? Really not an issue here unless you plan to lick the solder joints a lot. Once covered by paint is sealed up as well. No appreciable amount of lead in solder smoke as well, that’s burning flux. That’s not great to wiff directly but a small fan will dissipate that or suck it out of the area with a small fan with an activated charcoal filter on it. i e had good luck on brass to brass using a standard flux core sn63/pb37 solder and then also some liquid flux or paste flux painted on. A few years back I got some of h&n superior #30 flux at chad’s recommendation for soldering on larger metal bits and I’ve like it. https://hnflux.com/page35.html nice thing about painting in flux carefully is the solder tends to stick there first as opposed to non fluxed surfaces. I use these little makeup applicators to apply liquid and paste fluxes. like martijn said as little solder as possible, if it’s not flowing it’s probably not hot enough. When soldering wires or components there is little heat sink, but with brass parts, the whole thing becomes a heat sink. Chisel tip as well to get a longer area hot along a seam helps. This kind of brass part soldering is much more challenging than wires or components and boards. Use the left over sprew bits to just practice on. It really is one of the practice on to get the feel of it. I solder brass stuff like this infrequently so I always do some practice solders on scrap bits to get my groove back before going to the real bits. one other way to get flat bits soldered down is to pretin each surface then place the bit down and heat and the two pretinned surfaces fuse. This way you can avoid having a big fillet of solder at the edge. It is a challenge to situate the part while fusing but you don’t have to be holding solder so part in tweezers in one and and iron in the other. If not perfectly situated just reheat and move. Of course some parts with tabs and such you can’t pretin cheers jeff Link to comment
mags_minibuilds Posted September 8, 2023 Author Share Posted September 8, 2023 Thanks Jeff for the insights and advice! I will look into closer at the links of the products you provided. The main reason I don’t want to use lead solder is because I’m doing a lot of filing, sanding and scraping, the little bits go everywhere. If I’m soldering electronic components and leave the solder alone once it’s done then I would go for the lead solder. I will be paranoid about forgetting to wash my hands or something and go to prepare my son’s (7 year old) food. The rosin fumes I can somewhat work around. I try not to inhale when the fumes are strong. Good thing is I sit next to a window so I turn on my fan behind me and have it blowing towards the window so it extracts some of the fumes. Link to comment
cteno4 Posted September 9, 2023 Share Posted September 9, 2023 Yes sanding and filing in an environment with a kid is not good idea. Vacuuming well and washing well should be fine, but important to think of kid first. I don’t want to think about how many iq points I lost as a kid as I would scrape boat bottoms and those days it was heavy leaded paint! better safe than sorry. might test out some different non lead solders. I tried a few and remember one balled up a lot less than others, but that was years ago. flux is your friend and worth investigating more to see if there is a particular flux and non lead solder that gives you the best results on the brass parts. jeff Link to comment
mags_minibuilds Posted September 9, 2023 Author Share Posted September 9, 2023 I’ve been using an ancient roll of Radio Shack lead-free solder (it’s been stored in a box and no dust/dirt can get to it)…but still it probably isn’t the best thing to use. I found this rosin core lead-free solder on Amazon last night and thought I’d give it a shot. I’ll post my thoughts here once I receive it sometime next week.https://www.amazon.com/gp/aw/d/B06XC8QT51?ref=ppx_pt2_mob_b_prod_image This is the flux I’m currently using so I’ll test how it reacts with the new solder. https://www.acehardware.com/departments/tools/welding-and-soldering-tools/soldering-accessories/24995 Link to comment
cteno4 Posted September 9, 2023 Share Posted September 9, 2023 Yes I would look at some newer non lead solders, they have been trying to improve them! This is an acid based flux. These are aggressive, but need to be washed off after you are done as later then can cause corrosion. also forgot to mention it’s good to clean your parts before soldering as finger grease can effect the solder flow. I’ve liked the h&n #30 for soldering wires onto larger metal strips and it says it’s formulated for both lead and non lead solders. like Martijn mentioned it’s important to regulate the hear right to keep the solder to a minimum. cheers jeff Link to comment
Recommended Posts
Create an account or sign in to comment
You need to be a member in order to leave a comment
Create an account
Sign up for a new account in our community. It's easy!
Register a new accountSign in
Already have an account? Sign in here.
Sign In Now