shiniji Posted August 22, 2021 Author Share Posted August 22, 2021 It goes on! The turntable module is almost torn off. The new module is fitted and 2 new modules have also been created to compensate for the lengths. now the yard can finally be extended with the new Tomix sets. The 20cm module gets an S99 + S13.5 track. so I have 4.3cm at each end for the vario track. 3 Link to comment
shiniji Posted September 8, 2021 Author Share Posted September 8, 2021 Hello Guys 🙂 the modules go a little further. Since the first delivery arrived with the extensions for the railcar shed and the tracks, I was able to extend this and also the main line. As I'm still waiting for the siding to be expanded, I started painting the new tracks with rust paint (this improves the look a lot!). Best regards Patrick 10 Link to comment
shiniji Posted March 30, 2022 Author Share Posted March 30, 2022 Good evening, after a long time I continue with my IG-nippoN modules. Last year I thought about how I could improve the corner modules and so I came up with an idea. These curve modules consist of groups of four segments that make 90° and replace two 120cm track modules and a corner module. The body of the modules is again a box which is still being adjusted with dams and cuts. The head pieces were all lasered and I immediately ordered wood for 16 boxes or for four 90° curves. The radius is gigantic at 1600 😮 That would be the biggest innovation 🙂 Because the previous modules were all actually built in a modern and urban way, I really wanted to build something rural. So more for the JNR models. So I also built 3 module boxes with 120cm x 80cm which have two head pieces. A small station with a branch to another line is to be built on these modules (hence the 2 head pieces at the ends). Here I will also carry out the track construction with Peco Code 55 as well as on the new curve modules. What I'm still missing is a nice track plan of such a station from the JNR period. In the meantime, a Tokyo Tower from Sega has finally found its way to me, yay. Patrick 🙂 7 Link to comment
shiniji Posted April 1, 2022 Author Share Posted April 1, 2022 Today I started to attach the S35 tracks for the transitions, which should later be able to be connected to other modules via the V70 tracks (IG-nippoN module standard). Within the curve modules, the transitions are built with Pertinax sleepers from the Digitalzentrale (for the Peco Code 55 tracks), this stabilize the tracks at the ends. tomorrow I will stick the first cork insulation so that I can lay the first tracks on Sunday. 7 Link to comment
katoftw Posted April 2, 2022 Share Posted April 2, 2022 Just curious how you power your tracks. And when having turnouts on the edge of modules, you have no issues? Link to comment
shiniji Posted April 3, 2022 Author Share Posted April 3, 2022 (edited) On 4/2/2022 at 8:52 AM, katoftw said: Just curious how you power your tracks. Hello Katoftw, The power supply is made via an electrical ring line which feeds each module. The ring line gets its power from the transformer which leads to the ring line at the station. 🙂 Here can you See this No, so far I haven't had any problems with the switches on the edge of the module. And I've had the modules at several exhibitions. 🙂 It goes on, yesterday I laid the first tracks after I quickly laid the cork insulation the night before (and yes, as great as the Peco tracks are, they're so bad to install on modules. 😕 ). So I was only able to create one module group. But ok, today I was able to take a look at the results. I made the curve superelevation with strips that I cut from a 0.25mm Evergreen sheet. I think it looks great 😄 Edited April 3, 2022 by shiniji 6 Link to comment
shiniji Posted April 11, 2022 Author Share Posted April 11, 2022 Hello Guys, I finished the curve of the track yesterday 🙂 tomorrow I will add the missing sleepers, age the tracks and ballast, build up the terrain with Styrodur and the catenary masts will be put up. At the moment I'm still waiting for a few Peco switches for the station and then it'll start there too. My new Shinkansen 500 (16 parts) was then put into the curve as a test. 🤩 9 Link to comment
Martijn Meerts Posted April 11, 2022 Share Posted April 11, 2022 Sure makes the shinkansen look a lot better 🙂 2 Link to comment
gavino200 Posted April 11, 2022 Share Posted April 11, 2022 On 4/3/2022 at 11:58 AM, shiniji said: I made the curve superelevation with strips that I cut from a 0.25mm Evergreen sheet. I think it looks great 😄 The modules look great!! Can you tell me a bit more about how you made the superelevated curves? 1 Link to comment
disturbman Posted April 12, 2022 Share Posted April 12, 2022 Susukuma has a few videos about that, it's in Japanese but quite informative. Speaking of curves, @gavino200, HS has Peco curve guides on sale if you are still looking for some and needed to order something from Japan. 1 Link to comment
shiniji Posted April 20, 2022 Author Share Posted April 20, 2022 Hello Guys 🙂 a few steps later on my Ig-Nippon modules. the catenary masts were set up at a distance of 27cm (perfect for using the catenary wires from Trainsetter). Then I drew the course of the mountains for later when the tunnel portals arrive and the level crossing has also found its place. Today I aged the rails and spread the gravel, this is real stone gravel from Koemo 5 Link to comment
Kamome Posted April 20, 2022 Share Posted April 20, 2022 Looking great. I love that sweeping curve. Awesome vantage point to watch trains run by. Any reason your single catenary masts were facing out? Was it to aid ballasting to stop debris falling into the attachment points? Link to comment
Martijn Meerts Posted April 21, 2022 Share Posted April 21, 2022 That ballast looks really nice, I need to have a look at that. I'm not unhappy with my custom Woodland Scenics ballast mix, but I might have to order some sample packages of the Koemo stuff for comparing 🙂 1 Link to comment
shiniji Posted June 27, 2022 Author Share Posted June 27, 2022 Hello Guys, @Kamome its right, The catenary masts are the wrong way around because of the ballasting 🙂 in know, a few months later..... here is the current status of my modules 🙂 The terrain was formed with "Styrodur" and construction foam. I put toilet paper over it with a wood glue-water mixture. Then I covered certain parts with Noch Felsspachtel and then colored it. The second semicircle is now also in place and the tracks are also in place (including the electrics). Then today I colored the terrain and started the first layer of grass fibers. Two more layers follow here before we start with the real vegetation. The buildings in the entertainment district are now roughly where they should be. it's progressing 😄 There are also a few videos in the IG-Nippon Facebook group from my first driving test..... it looks so incredibly good that I don't like the small corner modules anymore 😕 Oh, and before I forget, there will be a special module.... I think the pictures tell you enough 😛 Kind Regards Patrick 🙂 8 Link to comment
cteno4 Posted June 27, 2022 Share Posted June 27, 2022 Excellent Patrick! How do you attach your legs to your modules? They slip into a pocket and then bold through? jeff Link to comment
katoftw Posted June 27, 2022 Share Posted June 27, 2022 Somebody is a little obsessed with F-4 phantoms. 1 Link to comment
disturbman Posted June 27, 2022 Share Posted June 27, 2022 Japan was. They retired the last one in 2021. Link to comment
Cat Posted June 27, 2022 Share Posted June 27, 2022 Nice! For the city section, I would suggest setting up the buildings on their own street lines and not following the curvature of the track, that gives more visual interest and is more typical of city street patterns. Or if there is a road that curves along with the track, that is not where the lines of buidlings are, but the buildings are at the ends of connecting streets. Katsuta has a very dynamic example:https://www.google.com/maps/@36.3914409,140.5244703,727a,35y,93.89h/data=!3m1!1e3!5m1!1e4 4 Link to comment
cteno4 Posted June 27, 2022 Share Posted June 27, 2022 Many Ttrak modules fall into this trap of roads and buildings following the track tightly, but little room there to work with so it usually forces the situation some. But some of the best Ttrak scenes I’ve seen have been ones where the roads, buildings, and details are askew of the tracks. jeff 2 Link to comment
cteno4 Posted June 28, 2022 Share Posted June 28, 2022 So I’ve been thinking about this quite a bit as the last week I’ve been mentally laying out a few Ttrak module ideas and came to the realization that the smaller the module the more the track dominates the scene and the more reason to try to make the scenery try to not flow too much with the track or it may not stand out much on its own. It’s one of the drawbacks of Ttrak with the very noticeable ovals being so strong visually even in bigger setups and all the more reason to make the scene details bolder to help distract from the track some. Jeff 2 Link to comment
shiniji Posted June 28, 2022 Author Share Posted June 28, 2022 Thanks guys for your feedback 🙂 @cteno4 The legs are currently fixed with screws. But I'm making a template here to drill all the holes for the carriage bolts like on the other modules 🙂 By the way, these are transported in one box (or in two for the quantity). because of your feedback I rearranged the houses and it looks so much better now, you were right. the greening of the modules continued today, with the first 2 modules already having the 2nd layer of grass fibers. Tomorrow they will get bushes, undergrowth and trees. and for the Godzilla diorama a couple of tanks, these get a muzzle flash incl. sound module and random control 5 Link to comment
cteno4 Posted June 28, 2022 Share Posted June 28, 2022 Cool, legs are the worst thing to deal with. wow that does look nice, feels like the usual sort of haphazard changes you get with streets and small angle changes and brings the buildings out a lot! this is nice as the track looks more hidden and secondary when no train is present and the scenery takes over, but I bet when a train goes thru things will flip. Richer all around. Thanks for validating physically what cat mentioned and my brain was chewing on with some smaller versions of similar scenes for Ttrak. it’s funny as a lot of my thinking in the past with roads were on the larger JRM layouts where we had tracks going all over the place so roads usually were not following tracks much (but the spaghetti bowl of track could really dominate and hard to hide much), but with Ttrak a good shrunk of each scene are 2 tracks front and center and the track plan very simple, different thinking needed. I do want to make some front to rear transition modules so that a stretch of track flips the modules and scenes around and takes the track to the backside of the modules. cheers jeff 1 Link to comment
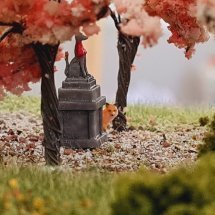
shiniji Posted June 29, 2022 Author Share Posted June 29, 2022 it goes on 🙂 I still want to get some things done by Friday (on Saturday the modules can be seen at a summer party at my local dealer). Picture with the EF55 delivered yesterday: Today I aged the tracks in the station so that they now fit better with the gravel ones (I built them with Tomix Wide Track tracks). i am now done with the greening on the first 4 modules, now the trees and the details come next. The river bed is also prepared for pouring the resin. 10 Link to comment
Recommended Posts
Create an account or sign in to comment
You need to be a member in order to leave a comment
Create an account
Sign up for a new account in our community. It's easy!
Register a new accountSign in
Already have an account? Sign in here.
Sign In Now