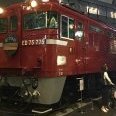
ED75-775 Posted February 22 Share Posted February 22 (edited) Way back in June 2023 I picked up a Micro Ace A2281 KiHa 42600 railcar set from Mandarake Hakata at the budget price of ¥10,000. What I didn't know at the time was that the trailer car was missing one of its headlight prisms, a fact I wouldn't learn until it was safely in New Zealand. It's been high on my list to try and get it replaced, if only to make the train complete and settle my OCD-neuroticism down (incomplete train! Eeeek!). There's just a few problems with that though; namely, Micro Ace does not sell individual parts of that nature, and I am not adept enough to have adapted a Kato prism to fit - yes, I've tried that too. Even a local 3D printing and scanning firm had to decline to help - this part is just too small for scanning and printing! See photo below: So, does anyone have any ideas on how I could fix this? So far I've not found any similar vehicles or vehicles with similar headlight parts for sale online, Micro Ace does not have an email address so I can't ask them if they would replace it under their repairs department, and I don't really want to have to buy a whole other set just to junk it for one headlight prism. Thoughts and advice please? Alastair Edited February 22 by ED75-775 Link to comment
SwallowAngel Posted February 22 Share Posted February 22 You could try using epoxy (?) but I am not sure how well that would work... (+ epoxy can leave a mess if not done right) I am pretty sure I have seen people use that stuff to make clear headlight lenses, but usually on bigger models. Wether or not it's a viable option in N is another question... 1 Link to comment
cteno4 Posted February 22 Share Posted February 22 Something to try a bit less messy than epoxy is gallery glass. It’s an acrylic liquid you can use to make pho stained glass. You can get it in small bottles and applies pretty easy and you can get it in clear. I used it to make some streetlight lenses over smd leds. you could try taking a bit of clear acrylic stock and wirh small file whittling it down to the part shape. Piece of clear plastic sprue from a model might do it or bit of acrylic rod from the plastics shop. File it down to shape but keep it attached to the stock to hold onto it while working on it. Hardest trick will be to polish the outside face. His is done with finer and finer abrasives then a little polishing wheel on a dremel or such. micro ace is notorious for not providing spare parts and I’ve not heard of folks getting repairs done at ma for missing little cosmetic bits, only big broken things like melted trucks and such. jeff 1 1 Link to comment
ED75-775 Posted February 23 Author Share Posted February 23 @SwallowAngel @cteno4 thanks for the advice so far. Having run the lens over a ruler at home today, I've come up with the dimensions of 2.5mm long, with diameters of 3mm wide by 0.5mm long for the actual lens, plus 1mm for the smaller lighting guide that plugs into the railcar cab roof. This is perhaps too fiddly to try remanufacturing from scratch. Luckily, and if my measurements hold up, I have found online sources of 1mm and 3mm diameter clear acrylic rod via eBay. They're also moderately priced too so that's a bonus. Of course, the other option would be to use a short piece of 1mm acrylic rod through the lighting channel, then utilize my (unused) bottle of Microscale Kristal Klear to remake the lens itself. I brought a bottle a few years back after a Hokkaido DD51 I had shed a lighting prism and I though mistakenly I would need to remake it. I'm leaning towards this as an option, since it would be easier than paring a piece of 3mm rod down to 0.5mm thickness, plus I won't have any issues with the lens ever popping out again! I have got toothpicks and syringes on hand so it wouldn't be impossible to do myself. Thanks! Alastair Link to comment
Kingmeow Posted February 23 Share Posted February 23 Take a look at Bondic, which is a UV cured resin/glue. The good thing about this is that you have all the time in the world to set up what you need and then set it with UV. I've never used it myself but supposedly crystal clear when cured. A few model railroaders have report good experiences with it. https://notaglue.com/ 1 Link to comment
cteno4 Posted February 23 Share Posted February 23 Oh yes the uv polymerized acrylic, it does cure up very clear and it’s sort of thick so you can sort of make a little dome with it. jeff Link to comment
disturbman Posted February 23 Share Posted February 23 I would just ask a friendly shop if they could help you out. MA doesn't sell many parts, but they some time provide them to shops. The alternative is to sort out with that shop that they send the model back to MA for repair. I don't know if they still only do non-cosmetic repair or not. You could check YJA to see if the older release(s) sell for junk price. Maybe their parts would fit yours. 1 Link to comment
ED75-775 Posted February 24 Author Share Posted February 24 Some more good ideas coming through, thanks guys! @Kingmeow the UV resin sounds interesting, reminds me that one of our members has a UV adhesive which he got to try out on his Rail Zeppelin a few years ago after it jumped off a curve and hit the floor at a show. I might enquire with him about that on Tuesday night when I catch up with him. @disturbman I had a look on Yahoo! Auctions and the Micro Ace website; the KiHa 07 family has only been produced twice - first in 2011 and then again in 2022. Since I need a insert for what Hobbysearch refers to as a 'recessed headlight' the only match is the A2288 set, and luckily for me someone has a trailer car from that set for sale online! Looks like the headlight prisms are a match too. If I can't land that I will get in touch with Tokonami-san at Rail Gallery Rokko and see what he can find out. My suspicion is that the headlight insert is a common part with other trains in the MA catalog, but with which models I wouldn't know. Alastair Link to comment
disturbman Posted February 24 Share Posted February 24 @ED75-775 That's great news. In my experience, MA parts are relatively interchangeable (at least the motors) and it can be easy to repair one model with parts from an unrelated model. That said, I don't know enough about the Kiha 07 to guide towards models that could perhaps share that part. Fingers crossed you can lend that car from A2288 🙂 Link to comment
ED75-775 Posted February 26 Author Share Posted February 26 A quick update: I managed to land the A2288 trailer car. It's a bit of a mongrel car - the chassis comes from one of the two trailers used as the 'end' of the consist in the set, while the body comes from the motor car (KiHa 07 207) of the same set. Makes it a little easier for me to disassemble when the time comes, though now I'm starting to think I want the full four-car set as well! Having looked at photos online as well, I'm confident that the part will fit as well. And for added and mildly unrelated nerd points, I should also disclose that the IRL KiHa 42600 series was reclassified twice during its working life: the entire class of twenty cars were reclassified as the KiHa 07 100 series in 1957, while fifteen of those were fitted with new transmissions and improved MU equipment between 1960 and 1963 to become the KiHa 07 200 series. While the last of the 07 200 series would last in service until 28 March 1970 when the last three cars (KiHa 07 213-215) were retired, the 07 100 series had all been withdrawn by 9 June 1966 when the last two cars (KiHa 07 106 and 07 116) were officially written off. My missing-headlight example, KiHa 42616, was one of the unrebuilt five and was retired on 31 March 1966 as KiHa 07 117. Alastair Link to comment
disturbman Posted February 26 Share Posted February 26 Huzzah! That’s great news. 3 hours ago, ED75-775 said: though now I'm starting to think I want the full four-car set as well! That’s the power – or danger – of YJA 😄 1 Link to comment
cteno4 Posted February 26 Share Posted February 26 Now you need to model the scrap yard scene of one being put to rest. Fitting end to the extra bits. jeff 1 Link to comment
Recommended Posts
Create an account or sign in to comment
You need to be a member in order to leave a comment
Create an account
Sign up for a new account in our community. It's easy!
Register a new accountSign in
Already have an account? Sign in here.
Sign In Now