Search the Community
Showing results for tags 'diy'.
Found 1 result
-
My custom solution for lighting KATO DCC trains
paolo posted a topic in DCC, Electrical & Automation
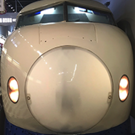
So, here's my take on how to light the interior of a model train. In particular, I'll talk about N-scale KATO trains (I haven't tried this on Tomix) in a DCC system. Since I have DCC, if I wanted to use the KATO lighting kits, I'd need to put a decoder for each car. I have around 80 cars, so the cost would be very high. Besides the KATO light decoders (FR11) are very hard to find, even in Japan. So I decided to just forget about decoders, and have the lights always on. Passenger trains usually have the interior lights always on anyways, and I don't have a yard where they should be off. Without a decoder, I couldn't use the KATO light kits, as the LED's would burn out after a few minutes. DCC system outputs around 18V, but those LED's are usually designed for max 14V, according to their manual (I wouldn't push them higher than 12V though). So I've designed a custom board, with the LED's and a few elements needed to make this work. I have no experience of soldering, so I looked for someone who could do it for me. A friend told me about JLCPCB.com, a Chinese PCB prototype company, that can manufacture a small batch of PCB's. They have a very user-friendly design tool, needed to produce the files that are necessary to get the PCB into production. Each board has: 4/6/8 LED's, depending on the type of car. Shinkansen have eight, some Shinkansen cab cars have six or four (for the Komachi). Other trains have six or eight. The LED's are arranged in two groups in parallel, with each group having the LED's arranged in serial a diode bridge, that converts the AC coming from the tracks to the DC that the LED's need (BR1) a low-dropout regulator, that lowers the voltage from what is coming form the tracks (around 18V) to 12V needed by the LED's (U1) a capacitor, to temporarily store some electric energy in order to avoid the LED flickering effect (C1) a resistor for each group of LED's (so in my case, two total, R1 and R2) This is the electrical drawing of the version with 8 LED's: Here's the list of all the components, with the link to the LCSC Electronics website, used by JLCPCB: - cold white LED, package 0402, link - 40V 1A 550mV @ 1A MBF Bridge Rectifier, link Fixed 35V 12V 2V @ 1A TO-252-2(DPAK) Dropout Regulator(LDO), link - 22uF ±10% 25V 1.2 Ω @ 100kHz -55℃ ~ +125℃ CASE-C_6032 Tantalum Capacitor, link - 402Ω ±1% 0.25W 1206 Chip Resistor - Surface Mount, link This is the PCB view taken from the online editor (easyEDA😞 Each PCB costs around 1.9 euro, in detail: EUR 0.3 for the PCB prototype EUR 1.6 for the components and the assembly Then of course you need to add the shipping. I got them in three separate orders, each time I refined the design. The last order was for a total of 50 pieces, EUR 80 for the components and 30 for the shipping. The minimum size for a PCB if you ask for the components assembly is 2 cm, but that's too wide to fit it inside a car. So once I received them, I had to cut them one by one so they could fit. I cut them to around 1.3 cm using a Dremel. The lengths vary from 13 cm to 6 cm. The next problem was how to connect the PCB's to the copper pick up of the car. The KATO lighting kits come with a set of copper strips that fits in each car, these: After a lengthy search, I was able to find them on Rakuten Japan,sold in a package of 20 strips at 480 yen: This is the link to the Rakuten page. If you need to look for them, this is the title of the item: オリジナル K集電金具 集電板(集電シュー) カトー(kato)にも使えます 20個セット Using a short piece of wire, I soldered these strips to the PCB (I bent them downward so they make a better contact with the wheels): On JLCPCB, they only have cold white LED's, while most of the trains have more like warm white lights. So I had to find a way to make them yellowish. I tried putting a drop of orange paint on each LED, but the result wasn't consistent, you had some really orange ones and some white ones. After watching a video on Luke Towan's YouTube channel, I decided to use his method and apply some Tamiya tape, usually used for masking before painting, on each LED: To fit the PCB inside the cars, most of the time you need to trim the plastic supports, that I think are designed to hold the transparent acrylic strip used in the KATO lighting kits. Without trimming those, you won't be able to close them properly. This is the final result (sorry but getting the right color temperature it's a bit hard, in the pics they all look much more blue than they actually are): I used them on Shinkansen (N700A, E2, E3, E5, E6, E7), E233, E235, E657, E353. They all fit perfectly. I'd prefer them to be a bit warmer, but they're good enough. I think that's it 😄 Paolo


