All Activity
- Today
-
The total distance between the center of the track and the "safe space next to the track is the overhang + half the width of the railcar. NEM also says that the overhang is equal on both sides of the center. I guess there is just so much distance you can have between the bogie and the front, and in general it shouldn't be more than half the railcar's length... (Which I assume would be the only way to have a bigger overhang at the front). Making the brackets an individual part is really important. Besides the normal zigzag path a wire has on the straight track, you just can't accommodate for all possible distances the masts will have in a curve. And the distance the wire is off the center in a curve (which it always is) depends on the length of each segment...
-

Just announced, attempt at largest T-Trak layout in the world 100 ft x 100 ft
cteno4 replied to Kingmeow's topic in T-Trak and Other Small Modular Formats
Well if less is more then it follows that more is less so more more is less less… go figure. Im sick of being asked “Would you like to SuperSize that?!” I always bite my tongue from saying “No could you please SmallSize that for me?” I even at times order off the kids menu as it’s closer to my appetite many times. It is this obsession with big! The last couple o years I have gone back into exhibit developer mode and been watching folks and how they approach, walk around, how long they spend, and where they leave. Less than half make a complete circle of even a 2 or 3 table square/rectangle. Kids are actually the best at wanting to see it all. Adding more does not retain more. But my complete focus on doing events is not on model train folks, its on regular public and leaving a big stamp in their brains model trains are a fun hobby to think about, then that makes it all about giving an experience that plants the best seeds for that. There being big can make it seem totally unapproachable to the public. To each their own. Jeff -
LOL as i was starting to read this and looking at the first illustration of the Y the same method popped into my head for it and to just glue or solder it where you want and as i scrolled down there it was in total 3D graphic glory! Nice work joe. jeff
-
Looking for a Hobby Shop in Japan which does Custom DCC installations
cteno4 replied to Blackcaim's topic in DCC, Electrical & Automation
That would be excellent to buy them pre installed and not have to ship stuff back and forth! jeff -
This rather nicely brings up another part of the design I have a looking at. The position of the brackets to hold the overhead wires. A lot of the reference in formation I was sent was taken from the World Kogei brass kits. Similar to the plastic catenary the position of the insulators and the Y shaped brackets that hold the lower arms it fixed in a position. Something like this: This seems rather limiting to what you can do. With what Junech mentioned running a wider gap between tracks would put all the mounting points in the wrong place. I have drawn a couple of examples of design differences I have noticed, there are many more. For the 3 track example it is quite common to run two tracks under top mounted connections and the third with a side mounted arm (top right). For the 4 track example it seems quite common the use the longer span with less fewer tracks (bottom right) to reach over obstructions such as access roads or platforms. I am thinking about making the various connections separate so that they can be moved around to suit any track plan. Using the Y shaped support as an example I was thinking of something like this: There would be a little fold down tab at the top to help with alignment: This could then wrap around two sides of the gantry and be glued or soldered in place: This would mean more construction however I feel that it would be worth it to allow more freedom to create what you want. If you just wanted a simple representation of catenary you could even them off. Let me know if you like this as an idea or if you would prefer them to be fixed. Joe

-
Interesting. Good to know, I wonder how much different loading gauges would affect the amount of overhang.
-
The set track curves I have are 315mm radius so not a particularly tight curve. The longest body cars I have are a Class 800 IET (prototype 26m coach) and I figured I would test a Shinkansen coach as it has a different loading gauge to the oddly narrow trains in the UK. I chose a 700 Series because it's the best looking 🤭 and it has a broad front end. Side by side the wheel placement is roughly the same with 800 having a longer overhang at each end. Clearance is fine at the car ends, they barely go beyond the edge of the track. The 800 is more pronounced but even then the overhang is under 5mm. The nose of 700 sticks out by a similar amount. Clearance on the inside is more pronounced and again the 800 overhangs more. I am actually not sure the 800 would be to happy going around a much tighter radius, the longer ends do make quite a difference, the coupler was almost over the outer rail.
-
You won't be able to run that max-size NEM railcar in parallel on a R140/R103 double track since the overhang of both cars would be more than the distance between the tracks. So, the track with the bigger radius would need to increase to a radius that would allow the railcars to pass each other. The bigger radius curve would need to increase its radius to half the width of the railcar + the overhang. So you will end up with an R243/R103 curve with tomix track and have a total distance of 175mm. That would result in using the 4-track wide catenary... That leads me to the result that for Tomix, Kato and any other fixed track, you wouldn't need more than double the standard track-width for catenary length on a double track. If more would be needed, you would need to increase the distance between tracks to the next radius to let railcars pass each other. And if you do that, you would go with a 3-track wide catenary or even 4-track/5-track wide catenary. So Tomix would be 75mm catenary and Kato would be 70mm catenary at least from the calculations point of view. But that follows the NEM standards, which are European...
-
For anyone who's curious about the process of ordering from CHANGMING's Taobao storefront for the upcoming CR200J, it's a bit involved but this is how I understood it (with a bit of DeepL/Google Translate). Of course, if you want to avoid this hassle you have wonderful people like Stephan and Vincent at J-Scale (link | link) or Jacky from CNRailModel (link | link) to basically make this like any other online purchase, which is my recommendation. Khaho is another option but I have no personal experience from them yet. Anyways, I mainly did this because I already had a Taobao account set up and verified. Here are the steps: You need a Taobao account. Getting one ranges from moderately to very annoying depending on your luck with account verification as you may need anything between your phone number to your passport and support is useless for most account suspension/locking issues Go to the CR200J page and select your flavour of green: link Click "add to cart" (the lighter orange button) Go to your cart (the link with the small cart icon in the header) and select checkout (the orange button underneath the ¥200) Under 跨境段物流方式 (cross-border logistics), select 跨境段物流方式 (contact seller for overseas shipping) - if you select the other options you'll pay for overseas shipping which will not apply on a reservation, so you'll be wasting your money In the right box, select either AliPay (the top one) or Credit Card (in my case it said CAD as part of the text) depending on which one you have available Enter in your credit card details, optionally save it using the checkbox. I chose not to. There's a small fee associated with using a CC, something like 0.6% but it does convert directly into your currency After payment, CHANGMING will "ship" the reservation item to you. You have to accept this shipment for your non-refundable reservation to be locked in, it'll do so automatically after like 50 days I believe When it's time to pay for the remainder, CHANGMING will post a Taobao link on their Wechat where you can pay for it. Be sure to select the same car variant as you reserved. This time, ensure you're paying for overseas shipping (跨境段物流方式 section, select whichever one you prefer) CHANGMING will ship you the actual train and eventually, with a bit of luck, you'll receive it in a timely manner
-
Thinking about it, I assume the space between the tracks remains constant on the curves so that you can run parallel loops, that spacing allows for passing trains. Time to dig out my Kato track 🤪
-
Oh no Junech, I am getting flashbacks to that time I tried to work the cant angle for a curve. Firstly thank you for taking the time to time to look that up and give a detailed and easy to understand breakdown. Also well done for getting further with a formula than I ever would. My method to solving formula is to stare at the screen for ten minutes wondering what the life choices I had made to bring to this point. Then just go sod it, something like this will do: I do have an uneasy sense that someone will always find an obscure longer railcar from the annals of history or lay a tighter curve than I have planned for. I will check the dimensions for Tomix and Greenmax plus any others I can find. It would be interesting to know if all the manufacturers have settled on a similar standard or if they they have all reached different conclusions.
-
Random photos of stations I have visited
kuro68000 replied to kuro68000's topic in Japan Rail: Pictures & Videos
Akigawa Station 秋川駅 https://maps.app.goo.gl/sxc5fq6qSrcBkK3w8 Might be a bit too bright, but I like the contrast and crushed blacks.
-
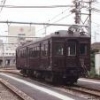
The pair of Kumoha51 on their first test run. Windows, Paint, Details and Shimatsu-Scharfenberg-Couplers are missing.
-
I looked up into the NEM norms and found this formula in NEM 104 to calculate the overhang: E is the overhang R is the radius of the curve A is the distance between the axles/bogie So we would need to find the longest distance between bogies and the widest width of railcars for each radius. The widest you could go would be the smallest track radius with the biggest railcar: The smallest Tomix radius is 103 mm, and the N scale NEM values would lead to a width of 28mm and a distance between bogies of 130mm. Putting that into the formula gives us ~23mm overhang. Adding half the width leaves us with ~37 mm. The parallel track would have a 140mm radius and a ~19mm overhang, adding up to ~33mm. Adding everything up says we need 107mm total just for the railcars so going up to 110mm for 2 track catenary would be necessary. But you wouldn't run the longest railcars through the tightest curves 😅 The standard T-Trak would need 80mm catenary with ~75.5mm of space for the railcar. So we would need to do a bit of thinking on this one...
-

Just announced, attempt at largest T-Trak layout in the world 100 ft x 100 ft
Tony Galiani replied to Kingmeow's topic in T-Trak and Other Small Modular Formats
I like to think "less is more". But in our part of the world, Frasier Crane's idea seems to carry the day: "If less is more, think how much more more will be!" Tony -
Random photos of stations I have visited
kuro68000 replied to kuro68000's topic in Japan Rail: Pictures & Videos
Shinmei Shrine, Sakado, Saitama. Had issues with the sky here, it's very bright. https://maps.app.goo.gl/qButTy7UnJHKgKur7 I've been adding some videos to my YouTube channel from Laserdiscs I have been capturing with a Domesday Duplicator. Unfortunately the player has developed a fault. First the belt went, an easy fix, but now the spindle motor seems to have failed, or perhaps the drive circuit. Either way it's not going to be an easy fix, so my plan is to buy an identical unit that is working, and then I'll have a supply of spare parts as well. I did a Japanese pro wrestling VHS tape as well, and I am astounded by how good it looks. I guess all the PAL tapes I bought in the UK to test out were just poorly manufactured or mastered, because in comparison they look awful. I have some more Japanese ones to do, including one from a series of old NHK news reports from decades past, which I'm looking forward to. I need to modify the VCR to extract the hifi sound though, which looks tricky.
-
KATO CHIBI LOCO TRAM Installed a 5v led strip, 2 leds only. Added a 680 ohm resistor. Need to figure out the power pick up solution for the unpowered car. Or just get another power chassis and make this pull stumps. Might be the easiest way to go.
-
Awesome point Junech, I did draw up the portal to Kato dimensions because I was thinking about the legs needing to align to holes on elevated sections. You are right the curves would be a more obvious purpose for the spacing. The narrow dimensions are fine on Yurakucho but that is because I am using real world curves. I have a Kato starter set somewhere. I doubt the curves are the tightest radius but it should give me some idea of overhang if I run some long cars around it. I was looking over the dimensions of the etched catenary I was given. The dimensions are around 75mm for a two track spans. It might make sense to make somewhere around 75-80mm the standard dimension.
-
Inspirational Scenery & Layouts
Khaul replied to Densha's topic in Scenery Techniques & Inspirational Layouts
Seriously? This guy is does the most amazing things I have ever seen. -

New E10 Shinkansen Announced!
Lessigen replied to cplchanb's topic in Japan Rail: News & General Discussion
Further to what katoftw said, I don't believe there was an officially stated reason for why JR East decided on E10 instead of E9. That said, JR East operates the E926 Series (East-i) and the E956 Series (ALFA-X) as a diagnostics and test bed train respectively. My conjecture is that they didn't want to confuse the train numbering of car numbers within a supposed E9 series; for example the E8 Series has cars numbered E811 and E821 (the head-ends) so that might make it confusing. -
Looking for a Hobby Shop in Japan which does Custom DCC installations
bc6 replied to Blackcaim's topic in DCC, Electrical & Automation
While in Japan I stopped by RG-ROKKO and peeked upstairs it seems like they have a repair shop maybe. I would reach out to Masahuru and see if he can offer custom DCC installations.- 7 replies
-
- 1
-

-
- dcc
- custom installation
- (and 1 more)
-
What did you do on your layout today? (N scale)
Khaul replied to bill937ca's topic in Layout Building
The kids are in Europe on vacation. So I commandeered one of the beddrooms and together the whole layout. The whole thing was design to fit on the dining table, but that's not an option anymore. Here you can see the transfer table, the access curves and one of the sections, not yet decorated. I added the decorated part, run quite a few trains and took pictures. The level crossing. From the undecorated module. Level crossing, daylight. I even took the good camera and went a bit artsy. -
Its the JR Research Cabin, They go on Koki.
-
Looking for a Hobby Shop in Japan which does Custom DCC installations
cteno4 replied to Blackcaim's topic in DCC, Electrical & Automation
Hobby Center Kato does have a customizing service, but from all accounts it’s quite expensive and i doubt would happen quickly. But worth a shot. jeff -
BANDAI B-TRAIN SHORTY Decided to add lights to this little guy. Used the C12 light board since it is tiny and bi-directional. Just wired it directly to the 11-109 motor power and double-sided taped it to the body. Used fiber optics to get the light out into the cabs. Yeah, a bit wonky as I can't drill a straight hole to save my life, so I just used the curve of the fiber to get them out to the windows. I need to figure out what I can use to get light out more easily as I want to get the red tail lights on my HO EF65 going. I tried leds but it interfered with the body mount.


