Rajabass Posted April 5, 2023 Share Posted April 5, 2023 Hi! I kind of have this layout, with a breakout train parking area at the bottom of the layout (greyed out), coming in from the right side of the station area. Now I want to connect the parking area coming in from the left of the layout, using an electrical point replacing one of the 317-curve pieces (circled out in red). But the only electrical point that ALMOST works seems to be the Tomix 1279 Electric point N-CPL317/280-45. But the branching out would then be on the inner side, or too short when branching out on the outer side (inner side 280, outer 317). What should I do? Is there another 317 curve I could combine to a shorter electrical 317-point to make this work, coming out of the 317-curve? Looking forward to any suggestions! Link to comment
bill937ca Posted April 5, 2023 Share Posted April 5, 2023 (edited) The N-CPL317/280-45 turnouts are the only curved turnouts Tomix makes. The only other source of curved turnouts I believe is Peco, but those lack a track bed. https://www.1999.co.jp/eng/10073995 https://www.1999.co.jp/eng/10073994 You could do something like this: Edited April 5, 2023 by bill937ca Link to comment
Rajabass Posted April 8, 2023 Author Share Posted April 8, 2023 Thank you for your reply! I'm not sure I fully understand your drawing, but it seems like you are suggesting me to use the 1279 N-CPL317/280-45 turnout, then a 1851 C280-curve for the continuing tracj, but wouldn't then the outer track eventually crash into the line of the inner track, which already has a C280-curve? By the way, I'm not familiar with Peco, but I'll look into it. Hm, tricky this one... Link to comment
katoftw Posted April 8, 2023 Share Posted April 8, 2023 Tomix don't have a product to suit. Would be better to have a set or turnouts on the upper straight and run a full curve of c354 around the outside. Link to comment
bill937ca Posted April 8, 2023 Share Posted April 8, 2023 I revised this. It is now 1850 x 775 mm. There is a small gap on the right side. Link to comment
bill937ca Posted April 8, 2023 Share Posted April 8, 2023 I pushed the sidings down a little bit more. Link to comment
bill937ca Posted April 9, 2023 Share Posted April 9, 2023 This is a full loop with making the sidings full circle. With each change the layout gets bigger and bigger. Link to comment
katem Posted April 9, 2023 Share Posted April 9, 2023 In Tomix geometry, a 90° curve of any radius is equivalent to a curve of a radius one size smaller plus 37mm straights on each end. This way, you can replace the two C317-45 at bottom left with two C280-45 and two S18.5 fractional rails at each end. Given this change, you now have a 90° curve of 280mm radius, perfect for the Tomix curved turnout! Let's have a look at its manual, what options does it give. Top left diagram gives you standard spacing of 37mm, while both bottom ones give you the platform spacing of 55.5mm. Beware, the turnout does not fit correctly in AnyRail, there's a workaround mentioned in AnyRail examples section. You should be safe using the configurations supported by Tomix even when it does not fit in AnyRail. 3 Link to comment
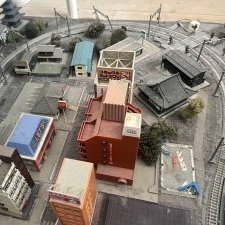
Rajabass Posted April 11, 2023 Author Share Posted April 11, 2023 (edited) Thanks a lot for both answers. I think I need to give an extra perspective. The layout I have can't expand in overall diameter, since it is fixed to a city layout mat. I've attached some photos. How ever I have modified the mat in the lower end, when removed the roads below the station, and made some parking for the trains and a train garage on the right instead. Just have some old pictures now, but can take new ones soon. Katem, your example seems to be possible to do, without changing the rest of the layout, nor expanding the total diameter of the layout, right? So either do the upper right example, with 3x18, then the inner of the CPL317/280-45, then another 280-45, then 3x8, if I understood that right. Or could using a N-PL541-15 work together in any combination? Edited April 11, 2023 by Rajabass Link to comment
katem Posted April 12, 2023 Share Posted April 12, 2023 (edited) 14 hours ago, Rajabass said: Katem, your example seems to be possible to do, without changing the rest of the layout, nor expanding the total diameter of the layout, right? So either do the upper right example, with 3x18, then the inner of the CPL317/280-45, then another 280-45, then 3x8, if I understood that right. Yes, no overall change to the layout except this particular curve. Just two of S18.5 on each end of the curve to keep the rest of the geometry intact. For the straight rail, you can alternatively swap one S280 for two S158.5 instead, as I did below. With this radius change, you get a little out of the gravel part of the mat here, as seen below. Dramatic AnyRail reconstruction of "before" and "after": Source AnyRail file Regarding the outer branch, I've never tried the C280-15+C541-15+C280-15 variant, Tomix does talk about it in the manual as working fine but AnyRail says it might be just a little shorter than needed. If that is the case, either go with the second variant from manual (C280-15+C280-15+S72.5+C280-15 curve) instead, or make the straight rail few mms longer by swapping one S140 with S72.5+S70 (as I did above) or even S72.5+S72.5. Bonus image: If you wanted to maximize platform space, this is one possible way to go: Edited April 12, 2023 by katem 2 1 Link to comment
katem Posted April 12, 2023 Share Posted April 12, 2023 (edited) 14 hours ago, Rajabass said: Or could using a N-PL541-15 work together in any combination? 541mm radius turnout is quite long for this use case and it is not proposed by Tomix, however AnyRail says that for example this configuration works (image below). Few different straight pieces can be used, the image shows one possible configuration. You can see that the bottom rail is quite short in this configuration, just over 530mm between turnouts (or little over 745mm if the extra turnout on the left is removed). There's also the PL-280-30 turnout which has more favorable radius of 280mm. However, because of its size, it is not possible to create platform spacing using this turnout, it is used to create double spacing of 74mm, which might not be feasible for you as it means the whole bottom side gets changed (pushed a little to bottom, or maybe to top if some tracks are rearranged). One such example configuration is below. I've also included the same configuration with a platformed dead-end track, if that would be something you'd like for shorter trains. Source AnyRail file Note about manual: PL-280-30 manual shows the spacing using straight bits, however it is possible to use one in curved position as well together with C317-15+C280-15 plus some extra straights, either 4× S72.5 instead of S280 (as used above) or variable rail V70 (as shown below): Edited April 12, 2023 by katem 3 1 Link to comment
Rajabass Posted April 12, 2023 Author Share Posted April 12, 2023 Wow, all this is great suggestions! Thank you for sharing your thoughts and knowledge! I’ll look into it and give it some more thought. I also have some challenges how to power every direction on the rubble, so anything that helps the flow of choices on the mat is good! And sorry for the too zoomed in and not so updated pictures, I’ll take an updated pic from above to show the whole rubble/station area as it is now, and what I need to keep and what I could change. I really like your suggestion on altering the station area for four trains coming in, by altering the inner track. I’ll really give it some more thought. I’ll keep you updated! 1 Link to comment
cteno4 Posted April 12, 2023 Share Posted April 12, 2023 Nice layout Rajabass! Start a layout topic on it and show us some more! jeff Link to comment
Recommended Posts
Create an account or sign in to comment
You need to be a member in order to leave a comment
Create an account
Sign up for a new account in our community. It's easy!
Register a new accountSign in
Already have an account? Sign in here.
Sign In Now