All Activity
- Today
-
Selling to train shops overseas: worth it or not?
Kamome replied to ED75-775's topic in Travel: Tips, Planning & Memories
If you had a set that’s difficult to find or only had a single run, never to be repeated, you may get a “decent amount”, probably 30% of what the shop will probably try to sell it for. Anything else, you’d get a token amount. As this is the very old 7 car set, possibly the original release, the likelihood is you’ll be offered an insulting amount for it from most shops. I do like your optimism, but the reality is it will not provide you with any money for other trains and when you suggest a meal or two, it may be more likely a single beef bowl at Yoshinoya, if you’re lucky. You often see older sets on the used market once updated models have been announced. Sorry to say but the Kato 500 sets in their various guises are often 10 a penny in a lot of used shops and are very low prices in many cases. And you may find they dictate that you need to provide an address and proof of one in Japan to avoid any issues with the possibility of receiving stolen goods. The general mentality is only non-Japanese break the law. Current trend seems to be to blame any incident of theft on Vietnamese migrant workers. So generally not worth the hassle. -

New Hokkaido Tourist Trains Red Star and Blue Star
miyakoji replied to RS18U's topic in Japan Rail: Pictures & Videos
Cool. Those Kiha 141 variants have an interesting history don’t they, starting as loco hauled passenger cars. JR Hokkaido once had the BBQ Car, I wish they’d do another one of those, probably the single greatest idea in excursion trains ever 🙂 -
Selling to train shops overseas: worth it or not?
mojo replied to ED75-775's topic in Travel: Tips, Planning & Memories
I emailed both of them to ask, I'll let you know if/when they respond. My Japanese isn't perfect but I find it's usually good enough. The other option is to ask the hotel staff to call ahead and ask on your behalf. They usually seem to be helpful in matters like that, as well as making bookings as restaurants and the like. -
Quiet towns in rural Japan in May
beakaboy replied to Grant_T's topic in Travel: Tips, Planning & Memories
enjoy your trip Grant. A bike sounds like a great idea! Nikko. That brings back alot of memories of our Japanese trip in 1985. -
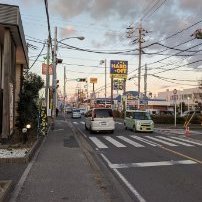
Yes the 1/64” pin tape is very thin. One of the reasons I like printing roads. inkjet printers are pretty inexpensive, it’s the ink that gets ya! yes a hallmark of much of Japan is a lot of above ground wires! jeff
-
RG-ROKKO'S PAYPAL PAYMENT SYSTEM FIXED NOW. Hello there from Japan, I'm one of the person concerned about RG-Rokko. RG-Rokko's payment problems via Paypal has been restored. We are sorry for your inconvenience. Please check RG-Rokko's website again. Thank you. https://rg-rokko.com/
-
And if you want to just model part of it: https://japantoday.com/category/features/lifestyle/japanese-company-starts-project-to-restore-nakagin-capsules-to-capsule-hotel
-
Another weathering procrastination project. With the almost full completion of a Nichinan formation (coaches 1 and 2 need detailing and actually still missing a Naha 10) I wanted to update my “warm region” EF58. The Kato model is a smooth runner but looks way too blue to match any of the images of these things back in JNR era. Putting off other hobby projects, 3x unfinished RC cars, painting some Marvel Crisis Protocol minis I was gifted, and still not having enough confidence/expertise to complete the EF510 roof and side dirt, I decided to try a simpler weathering project. Like with all Kato locos, the model came apart reasonably easily once you worked out what need to be removed first. The body was removed and I removed all interior parts and glazing so I could give the whole body a dull coat. Kato models usually have a semi gloss finish which is way too pristine and as the side is express blue, not that interesting. The bogies can be removed but you need to remove the light board and headlight housings before you can access the top cap of the worm gear that stops the bogies from falling out. There is a separately fitted brake rigging piece that is removed on the underside of the bogie before you can access the base keeper plate or remove the bogie sidewalls. It’s a little different to other Kato locos due to its unusual wheel arrangement. There is also a spring connecting the bogies to keep alignment which can also be removed once the brake rigging is off. The copper pickups are a single copper piece that runs to all three main wheels. Once the base keeper plate is removed, 3 lugs each side, the front bogie armature can be removed. The metal driving wheels are push fit on to standard Kato plastic gear axles so can be easily pulled apart to paint. The pony truck wheels are also push fit on to a metal axle. Wheels were sprayed with Mr Hobby Metal Primer before painting. Rims and pick up axles were masked with tape before priming and painting. With all of the parts removed it allowed for much easier painting. I rebuilt the bogies without the wheels to aid weathering so that there were no anomalies in painting once reassembled. Side air tanks were removed from the chassis weight and weathered separately. Colours -Bogies and wheels - Tamiya Nato Brown XF-68. This gives a good grime/rust look and to my eye is a good match to the general filth seen on the underside of modern trains here in Kyushu. Wheels sprayed a flat colour with bogies being sprayed from underneath. Body front and sides To simulate some of the kick up, I continued with XF-68. My airbrush has a paint flow limiter screw which is good to avoid an unexpected finger spasm and a big brown blob appearing on your loco. I started the paint flow off the model and then lightly brought it over the body where crud gets thrown up. I took this higher around the vents as well as used a thinned wash of the same colour to paint the vents by hand. Roof The roof needed a bit of artistic license. Images show quite a light sandy colour on some of these locos. I’m not clear whether that is the old photo colouration or it actually looked like that. I first started with a light covering of Tamiya Flat Black, XF-1 to give a sense of general grime. Then I mixed some Nato Brown and black together to lift the colour. I used XF-68 Nato Brown again to simulate the rust found around the pantographs and other panels. The final stage was to use Tamiya XF -52 Flat Earth to lighten the areas less rusty around the cab and loco middle and walkways leaving the pantograph areas. The eagle eyed modellers will notice the tiny chain I added to the air hose on the crewed end. I actually replaced the coupler to a Kadee No. 5 on the rear as i’ve had some coupler mishaps on rental layouts with the smaller 158s. Final step was to bring back some of the detail with some diluted enamel black pin wash.
-
More nice ideas, thanks! I've only got a B&W laser printer at the moment, but printing sounds like a good idea... might have to invest as I can see lots of other applications. @Cat I will take note of the purple! @cteno4 I found 1/64 tape on Amazon (and other widths) so I might add that to my ever growing list of purchases 😛 seems incredibly thin though - less than half a millimetre - I guess that's scale for those lines along the side of the road. I now also realise that Japan has so many powerlines above ground, something that really gives that Japan feel... maybe because of earthquakes or hard ground? Anyway Will try and add.
-
It’s a tempting Gomez Addams situation! glad your son is having fun running with 2 throttles! jeff
-
Yes it does depend on the venue, but I think we can in all of ours. Even our smallest setups in a 10’x10’ tent at cherry blossom and the Obon festival we can do a 8’x5’ with two tables side by side. Because both tents are best to wall/fences it does tent to make a front and back, but at cherry blossom we invited folks that wanted to to come around the back as well. Still would have been a lot better than a single narrow table display and while a big more room we would still have a front/back issue as folks can only approach the tent from the front and sides really. Our larger venues we have plenty of space to even do square spiral, we still will get a little bit of front/back issues due to visitor flow thru the larger space. I'm still convinced the rectangular 2 table beats the long and skinny 2 table on many counts. If you are backed up to a wall if you leave like 3-4’ behind the layout and encourage folks to step behind the layout as well. Worked in our cramped tent situation (we were cramped a bit due to the 2’ diameter x 18” high cement weight at each corner pole to keep the tent from sailing away. even thought the spiral table was significantly bigger with more modules (10.6’x10.5’ with 28 singles and 4 corners vs 8’x5’ with 14 straight and 4corners) it just didn’t present as nicely as the simple 2 two table rectangle. will be fun to see what your experiences are with all this! jeff
-
And the streets can have ninja everywhere if it's Ninja Festival in Iga: https://soranews24.com/2024/05/02/japanese-city-encouraging-visitors-and-locals-to-cosplay-as-ninja-for-annual-ninja-festa/
-
Everyone is awesome. I got it to work and am making sure that when the trains hit the crossover that it’s a slower speed. My son is running 2 trains and is having fun making sure they don’t crash into each other as they crossover. Thanks again everyone for all the inputs……It is a temporary tracks so not using the cosmetic attachments Interesting - my JR line train runs faster than my Shinkansen N700.
-
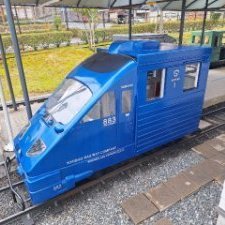
New Hokkaido Tourist Trains Red Star and Blue Star
RS18U posted a topic in Japan Rail: Pictures & Videos
Looks interesting, hopefully someday we will be able to ride one of these, preferably the Red Star to Abashiri to visit our friends there. https://japantoday.com/category/features/travel/beautiful-red-and-blue-star-luxury-trains-set-to-be-new-hokkaido-travel-stars-2- 1 reply
-
- 3
-

-
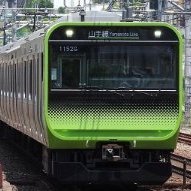 These couplers are gray does anyone know if these couplers come in black and the part number? They are available in black they are 0398 thanks.
 - Yesterday
-

Quiet towns in rural Japan in May
Grant_T replied to Grant_T's topic in Travel: Tips, Planning & Memories
I've been here for five days now (or is it six? I'm losing track of time). The writing is going well. I've also been on several very long walks and my legs are a bit toasted. I've bought more unitrack and some other things (including another guitar, doh). Yesterday I caught the Tozai line out to the vicinity of Kato Headquarters and then walked the rest of the way. It was pi#$%ng down, but I had an umbrella so it was quite a nice atmospheric walk through the backstreets in the rain. I was a little underwhelmed but by headquarters itself as the layouts really need a good spruce up. I also got a bit lost on the way back to the station. In my attempt to mostly stay offline on this trip I didn't bother getting mobile wifi or roaming. I'm also thinking about buying a cheap bike for the rest of my stay. I'm here in the the dormitory suburb of Nishikasai for the next week getting work done, and then I'm on a trip taking in Aizuwakamatsu, Nikko, Hiroshima and surrounds, Himeji, and Osaka. A question: Are walk up tickets generally available for baseball games (particularly in Tokyo and Hiroshima) at this time in the season? I haven't really been taking many pictures, but the ones I do take are mostly of details that might make it onto the next layout. -
This is a great topic, love all the excellent information. Once our little group gets going and to shows I will be recommending rectangular layouts vs long/skinny, however the set up of the display area has a bearing in this too. At the last show I went to a couple of weeks ago I can't see how we would have been allowed to set up with access all around unless it was monster layout. @cteno4 is this an issue with the venues you have done the rectangular set up at?
-
I will be going to the Victoria (Sidney) show in September so will be keeping my eyes open for anything I can find.
-
Yes, the best is to hook one throttle to each loop. If it’s a compete loop with just one crossover in it then you can just put a single feeder from a throttle to a loop and that should do it. You can use the Y adapter to feed a loop in two places across the loop from each other to make sure you don’t get any power drops if the loop is longer. Rule of thumb usually is about a feeder ever 2 or 3m. once separate throttles are hooked to their own loops you can run two trains, one on each loop with their own throttles. when you go to using the crossover you need to make sure both throttles are set to the same direction, then run the train thru the crossover with both throttles set to about the same speed. You may see it speed up for a second while it crossover as for a moment you will get voltage from both throttles and why you should not run the train thru the crossover really fast. the crossover track in the center is isolated to each track on the outside does not short out with the opposite track whe it’s switched to the crossover position. Does this make sense? jeff
-
Selling to train shops overseas: worth it or not?
cteno4 replied to ED75-775's topic in Travel: Tips, Planning & Memories
We have our free classifieds here on the forum which works pretty well. Only down side these days is international shipping rates are so high… jeff -
Yeah but that’s more fun to do with the Bluetooth speaker and trigger it when someone is right at it! You can really mess with them! Best when two people are there at it and they think it’s motion activated and wave their hands in from of goji and you only make it roar for one of the two. Great fun to mess with folks. but yes audio buttons are easy ones. That’s the other advantage of the rectangular layouts as you get a small strip of table to put buttons on, you don’t want anything mounted to a module or someone will poke it really hard. I’ve looked at table cloth clips to maybe attach interactive buttons down the table better, but the tables we use vary a lot! It’s on the list to get back into doing more interactive stuff. Even the dead track in the station to let a train stop and visitor has to push the button to start the train again can be fun. I do have a wireless dcc throttle that I’ve thought of wiring decoders to the track power so a visitor could run a train. Nice thing is you can easily limit the decoder output so that train can’t go past like 100kph. jeff
-
@N-Osoi great you are starting on a Ttrak module! Physical texture would be minuscule at scale, so best to just fake that with more visual patterning for roads. like others mentioned using something like 400 or 800 grit sandpaper will give that little feel of some texture. another approach is to print your roads. This is nice as you can easily experiment with various designs easily and make small road lines easily. You add road details like drains and manhole covers as well as pot holes, cracks, blemishes, even the tire and oil lines on the roads if you want. You can easily play with colors you want as this may have to be slightly different than in pictures and your usual viewing distance is like 250-500’ scale away and colors can change at distances. Lighting also is usually much different on a layout (we had that this weekend at a show being at the center point between the big sodium lights and not only punky color bit everything dim and foggy looking) than prototype outdoor sunlight. Print out on a drawing paper that has just a touch of texture and you will get a nice tiny bit of surface texture and help it not be shiny. Best to use an inkjet printer and not a laser printer as the laser printer’s fuser roll and the toner always ends up with a shiny smooth surface when you print larger areas like a road. I’ve really enjoyed doing the printed streets and works great on smaller bits like a Ttrak module. Let’s you play a lot with ideas. You can also use it just to lay out the design and then do it physically later. if you do it physically there are decal sets for road lines out there or you can get pin tape to lay the roads down. 1/64” pin tape is about scale but hard to come by these days but you can find 0.5-0.7mm pin tape pretty easy as used in fingernail art a lot. Search on ebay. of course you can get very detailed with Joe’s etched brass man hole covers and drain and tree grates! cheers jeff
-
A slight bit of purple in the grey is the magic blend.
-
Yeah I just don't want it too shiny, or black, or looking like concrete. I'll try the wet and dry paper, and I think someone said you can use nail polish tape or buy thin art tape for road markings. Will experiment with the weathering and scatter @Beaver - any examples of the older tarmac anywhere? What I'm trying for:
-
Jeff, at the very least you need a button to trigger Goji's roar!


