All Activity
- Past hour
-
Welcome Chris, glad you found us! Ugh oh sounds like you have caught the bug. Sorry no cure you [and your wallet] are sunk… cheers jeff
-
Yep you got it. Lets you switch any block to either cab a, cab b, or off! About as versatile as you can get short of going to dcc basically its what you/I drew up just repeated the same for each block on the whole layout! Each block has both wires wired to the dpdt for power and is insulated on both rails on anll ends of the block. Just keep repeating all over the layout. Biggest thing to figure out is where to put your blocks and where to put feeders in your block. Blocks are usually to isolate sidings and break up a large mainline into sections to help with operations. You could be running a train on the mainline but need to bring a train out of yard onto the mainline for a bit while you transfer it to another track. You could keep the train running on the mainline while you use the other cab to bring the train out and back into the yard on the mainline briefly. for the power feeds you want those spread out well and strategically placed on either side of points or double crossovers as needed. cheers jeff
-
Jeff Thank you again for your help Jeff, and yes you have made all this a lot clearer, it is starting to make sense, i will drawer it all out and let you have another look. i am glad i asked you for your help i could have been searching for a long time and i can also see that the placement for the power controls cabs comes into play as well, i will have a good look before going to far. cheers Jeff Tony
- Today
-
Hi @CWOOD welcome to the forum!
-
AH ok so when i have my whole layout wired for blocks and lets say i have all my DPDT switched on i could run a train a complete circuit around my layout ?? because all the blocks would have separate power from there respective DPDT switch ?? I think this is making sense and yes i was still thinking a cab power control for the inside track and another cab for the outer, this way i control both inner and outer with both cabs combined via block sections I think my problem is i wanted to know how it works before understanding the concept Tony
-
You may be confused by the partial block wiring using a common rail between two throttles. Its can have some issues and just a lot easier and safer to isolate each block on both rails on both ends and supply power to both rails in a block from the DPDT switch for the block. jeff
-
Each block of track you insulate both rails at both ends so the block is totally isolated from connecting blocks. Then you feed power to the block with your power feed [or multiple leads if the block is a long stretch of track] within the block that is then wired to the center terminals of the dpdt. Power is supplied to each block then by its dpdt switch that gives the block power from either throttle A or B or off. jeff
-
Jeff Its just jumped out at me i have insulated the rails so how do i get power ac cross them ??
-
Tony, ahh i think you are retaining the idea of inside and outside tracks both being controlled by separate throttles [sorry I used the shorthand of Cab for throttle] like you would with just using the point routing. with block control each block of track over the whole layout can be switched between your two throttles. This way you could set the DPDTs to be on throttle A from the yard on the outside loop, onto the mainline and then over to the inner loop. Then once there switch all the mainline track loop to Throttle B to run the train there while you use Throttle A back moving trains around on the outside loop. You no longer need to have a throttle dedicated to each of your loops when you use block wiring. It’s much more versatile this way and you can also turn blocks off easily if a train is on them and you need to move something else around on the same loop. So wire ever block of track on the layout to a dpdt switch and then your two throttles to each dpdt switch. You do the same thing everywhere. sorry i may have confused you earlier when i said inside and outside tracks when I meant to say inside and outside rails to keep your polarity straight on each block. make sense? jeff
-
Jeff Your 30 seconds has taken me days of googling and finding nothing and hours of reading with no information, your 30 seconds actually makes sense and i can actually see what goes where BUT how do i connect to the inside rail and how do the wires connect to cab A and cab B ?? is cab A and cab B simply connected together via the DPDT I can see that i can daisy chain the DPDT via a terminal block How do i wire up my block sections on the inside track ??

-
No worries im use to the snickers and the comments like it looks like it belongs on the refrigerator! I guess i could have done a ChatGPT statement and add “make it look like a 4 year old drew it!” basically all your blocks get wired as above. Of course for the throttle connections you can just do jumpers from switch to switch and then one end of the string go to your throttle. I would do like 18 or 20g wire for these connections between the switches. 18g gives good current, but 20g is more flexible in tight spaces. For the wires out to your track blocks i would use a terminal strip at the control panel to attach your long lines going out to the track to short pieces of wire to go to your dpdt switches. This will help if you have to do any troubleshooting later like a switch got its polarity reversed or something. Also makes it so you can pull the control panel off if needed and not have to snip all your track wires. just strip like 4-5mm and tin the end of the wire and tin the terminal and just fuse them. Goes pretty quickly. jeff
-
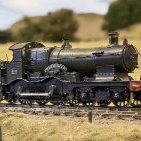
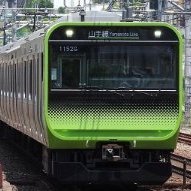
Today I picked up a Kato 4 car E231-500 to complete my grail set of a 10 car Chuo-Sobu Line set. I'm so happy to have completed this set.
-
Hello to all, I just joined this forum. I’ve primarily modeled European trains but recently discovered Japanese trains, and have been collecting as much as I can afford. I’m very excited to be part of this forum.//chris
-

Bill's Excellent Swiss Adventure
bill937ca replied to bill937ca's topic in Travel: Tips, Planning & Memories
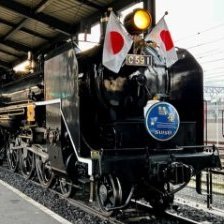
Heading to Basel. Wednesday was my day to head to Basel for one night. I took the IR36 to Basel. It runs every 30 minutes and takes just over an hour to arrive at Basel SBB. Basel actually has two main train stations, the Swiss station at Centralbahnplatz and the Deutsche Bahn station at Basel Bad. https://en.wikipedia.org/wiki/Basel_SBB_railway_station https://en.wikipedia.org/wiki/Basel_Badischer_Bahnhof As is typical my IR36 (Inter Regio) was due to arrive at 8.52am and depart at 9.08am, a span of 13 minutes. Indeed it was on time. There are five stops on the way to Basel. I will post photos from the train during the trip later. Photo: IR36 arriving at Zurich HB.
-
Hey it works for me LOL leave Jeff alone lol Just looking at it again, i need to do a sketch as well
-
Bill's Excellent Swiss Adventure
bill937ca replied to bill937ca's topic in Travel: Tips, Planning & Memories
Yes. Actually several cafes have a view of the train shed. II Baretto is on the concourse with a view in the general direction of track 3 way across the concourse. I had breakfast the final morning at Cafe Oscar but sat inside because of the raw weather. Cafe Oscar and Action Burger are back in the old train shed with a view towards the 1933 train shed. Brasserie Federal also has outside seating in the old 1871 trainshed, but it is further back. https://plans.trafimage.ch/zuerich-hb?identifier=geo-cafe-oscar-8162&layer=zurich_innenplan&x=683157.72&y=248046.31&z=19.98117604498825 -
Yes the de minimis exemption is only killed for shipments from china and Hong Kong. Exemption is still in place for everywhere else right now. Sounds like eventually they will kill it everywhere. China de minimis is like 90% of de minimis exempt packages and the main target of the tariffs. Who knows when the de minimis exemption will go away everywhere. Info on all this is so scarce and confusing. I am just hoping that my japanese de minimis dont get flagged as needing a full customs process that could entail fees even if no duty. Also the worry anything produced in china but sold thru Japanese shop [ie tomytec stuff] getting snagged as requiring duty. All depends on how these new systems are going to work and the what the powers to be are targeting with them. jeff
- Yesterday
-
Ha Ha! Laugh away! I figured i would get razzed for it! I worked very hard to make it look like a 4 year old drew it! But took all of 30 seconds to get done and just enough to get the the idea across. I dont use the Apple Pencil much and just did it in my lap with the screen vertical in the keyboard holder. Would have been nicer if i did it with paper and pen and then scanned it but so much more time and effort than needed! My design partner and mentor for 30 years could take a sharpie and make the most beautiful sketches of anything in just a few lines. The dude is amazing and worked in the eames office he is that good. I on the other hand have zero drawing and art talent/skill. Ive tired and tried and practiced and practiced but could never really get much better with form and pretty. I could always lay things out really well as a reflex, but not make it pretty at all. I use to tell geno that he should just do all the whiteboard sketches when we were meeting with clients and I could scribble my ideas fast on a piece of paper and he could do them pretty on the whiteboard really fast then and impress the clients [his simple drawings just made folks mouth hang open]. But he refused to do this and insisted i do my ugly sketches of my ideas directly on the whiteboard as we were in discussions on the fly with or without clients. He said it was better to just work on the ideas and not get folks all caught up in it just looking pretty as that really didn’t count most of the time and pretty could cover up a flaw in the basic idea easily. It worked well. Once an idea took root and major fatal flaws were knocked off geno would do a pretty sketch sometimes to sort of summarize it, but only some of the time. His insistence the idea of what we were trying to do was more important than the pretty designs/drawings in the up front thinking. We could always make it pretty as needed later and it was the idea that then drove the design and not the other way around. He was right as soon as we got into a design meeting no one worried how pretty all the idea sketches looked as if they were good ideas they were sucked into thinking about the ideas. jeff
-
Bill's Excellent Swiss Adventure
bill937ca replied to bill937ca's topic in Travel: Tips, Planning & Memories
Most SBB trains I encountered in Switzerland were double deck trains. There are InterCity and InterRegio versions. The RABe 502 by Bombardier has been problematic as its tilting technology has not worked properly. I read recent have complaints from riders that this shaking issue has never been resolved. There are 23 sets with eight cars each. German language Wikipedia notes: After the first trains were delivered, the roll compensation system generated negative feedback from passengers and train crew. The shaking movements and the associated lateral acceleration were perceived as above-average, especially on the upper deck. A software update was intended to dampen these movements and increase ride comfort. However, passengers rated the increase in ride comfort as minimal. [ 28 ] In the meantime, the situation has improved through various modifications. [ 29 ] However, train crews continue to complain about the increased physical strain caused by prolonged work on the train. [ 30 ] https://de.wikipedia.org/wiki/SBB_RABe_502 Photos: 1. RABe 502 at Zurich HB. 2. Close of the registration numbers.
-
@cteno4 thanks Jeff. I'll try again.
-
Hi guys just a quick intro Ant from New Zealand
brill27mcb replied to Antnz's topic in Layout Planning
-

Bill's Excellent Swiss Adventure
miyakoji replied to bill937ca's topic in Travel: Tips, Planning & Memories
Thanks Bill, I like the engines lined up at the physical end of the tracks. Was there a cafe there? I always thought such an arrangement should include a cafe, like a scene from a European movie. I love those switchers too. Wikipedia says they can do 62 mph. Hmm… -
Jeff, de minimis is still in place for shipments from Japan to the U.S.? Until when? (I can't keep up...) 🤪 Rich K.
-
Bill's Excellent Swiss Adventure
bill937ca replied to bill937ca's topic in Travel: Tips, Planning & Memories
Here's an article from Tagesscahu, a news and public affairs program shared by three Swiss and German tv networks that compares the Swiss SBB to Germany's Deutsche Bahn. Key points: While Switzerland spent €450 per capita in 2022, Germany spent just €114. The federal debt brake also contains loopholes to ensure SBB's financial resources. "Parliamentary sessions are aligned with the timetable, because a large proportion of members of parliament travel by train. Almost 93 percent of all SBB trains are on time. That means they're less than three minutes late. This works even in winter, when it snows. https://www.tagesschau.de/wirtschaft/unternehmen/bahn-schweiz-winter-schnee-sbb-100.html -
How did you improve your rolling stock today? (HO & other scales)
Kamome replied to Jaco3011's topic in Japanese: Other Gauges & Scales
Continued freight modelling with a few cheap products. Some 5mm diameter balsa wood dowels, Tamiya 3mm H beams and some ship modelling chain. Makes some simple log loads. The dowels were cut in 4cm lengths. Some of the Japanese modellers blogs I’d seen consisted of cut logs rather than full length logs taking up the length of the wagon. I couldn’t find any photo reference to confirm but as a number of modellers had made the loads like this, from O gauge to N, I followed suit. I intially tried this with some actual twigs but the variation in natural shape was very pronounced at 1/80 scale. The dowels are a little too smooth but at this scale you wouldn’t really focus in on the undulations of the bark IMO. I used some combinations of Vallejo acrylic in wood, burnt umber and a german light brown from the Panzer range. Also dusted with some mud weathering powder. I had already painted the deck of the Kato ToRa 45000s but it has been quite difficult to find suitable reference material on what they often carried. I added some extra dirt with the weathering master sets. Mud, Soot and Rust are pretty good in the A and B sets whereas the other colours I don’t use. The rust looks great around the modelled brake pads in combination with some Railmatch brake dust acrylic on the pad detail.The included brushes I find a bit useless but some cheap ¥100 eyeshadow brushes allow you to clad on the dust. Obviously a clear coat locks it in and dull end the effect. Support beams were added with Tamiya 1mm square beams and painted. I’ll finish the wagon off with some tie-downs, either with elastic line or some ship rigging cord. On a playability note, I did have to glue the doors shut so they wouldn’t keep flapping open. It’s a nice gimmick but as they’re never run with the the doors flapped down, it’s slightly unnecessary.