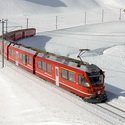
Tyraforce Posted January 2, 2022 Share Posted January 2, 2022 (edited) Hey, I’m about to build a 310x100cm N scale winter Albula layout using Kato Unitrack and Kato RhB stock. I’m posting this here as this will be a nice test of what those Kato products can or cannot do. Get ready for some crazy stuff. I’m about to push or break most of the layout rules in the book same way the Swiss broke most railway conventions when building the Albula and Bernina lines. Did I mention it’s my first layout? I have a large Lego train layout and a slot car layout under my belt but this is going to be a whole new challenge for me. I do understand this is a crazy “bite more than you can chew” project but I’d much rather fail this than go for one of those flat ovals with hill and a tunnel in the corner. Well that’s why I have 2… Anyrail plan here. FINDING THE PROTOTYPE I spent a decent amount of time in the St.Moritz area and I was considering doing the Alp Grüm section, however, a few months ago I saw this photo and it was settled. I knew about the Brusio viaduct but I'd never heard about all these spiral tunnels. They not only look great but the whole thing is very compact while being able to hide a whole train. Another great thing about all of RhB is how detailed info you can get. The whole line is even in google street view so you can follow the track 10m at a time with a 360 view or just watch one of the stabilized HD cab videos.https://www.pivovar-raven.cz/albula/albula_night.jpeg TRACK CHOICE I knew I was going to work with steep gradients and tight curves so I was looking for very reliable track. As most of it is going to be covered by snow I didn’t care too much about the visuals. As for scale, when I figured N scale oval with a station that would accommodate a standard 6-car glacier express requires 184x50cm, I knew HO was not an option. Then I found this little layout (watched it like 20 times) and I was surprised how well it looks even with mostly R150 curves and steep gradients. I'm also surprised so few people build N Scale RhB layouts. I'd expec way more. Anyway, I got me a Kato GEx starter set and realized trains run full speed over brutal R150 S curves on a 5% decline and I’m yet to see them derail. I really didn’t expect that. Long story short I’m now some 3000 EUR into it and still about a month from starting work on the benchwork. https://i2.wp.com/transitmap.net/wp-content/uploads/2020/08/swiss-spiral-tunnels_1952.jpg?resize=1194,412&ssl=1THE PURPLE PREDA LINE The layout has 3 continuou loops. I expect my kids to play with this and I needed a 3-train continuous operations. The Preda line will be the last and hardest part to build. It’s 15m long and uses the R183 radius except for a single hidden R150. The single track descends from Preda thru two spiral tunels to arrave at Bergün, which I replaced with Filisur as it’s way more interesting. It’s a shame I had to cut the freight sidings but otherwise the station is rather accurate. The line continues to Davos but somehow emerges from the Albula tunel completing the circle. THE GREEN LANDWASSER LINE This is an oval that extends the Preda line over the Landwasser viaduct to another station, which I call Chur but it’s not based on anything really. It’s purpose is to connect all 3 lines and provide some sized sidings. The line is completely flat and aligned with the Landwasser modded kit, which I hope will end up around 13,6cm. I was considering going for the full 40cm to match the prototype but gave up. The biggest compromise I made is leading it back to Filisur which makes it look less like Filisur. It was prototype vs fun of having 3 lines that can be operated independently. The line is 9m long and uses min R183 curves (I hope to push it to 216 depending on the Landwasser profile). THE YELLOW UTILITY LINE This is a utility line featuring a 320cm reversing track with 2 integrated staging sidings overseen by a camera. It stays in the lower parts of the layout thus enabling me to run longer trains one would expect to see in a town like Chur. It’s 11m long and the min radius is 249. THE WHOLE CRAZY THING Including all sidings, this layout has 50m of track with 28 turnouts and track height difference of 30cm. It’s designed for 6-car passenger/mixed trains of 90cm with the staging area being able to take trains of up to 116cm. Preda has the shortest platform (4 cars tops) but the passing siding extends way beyond and is long enough for all my trains while only the shorter ones will stop there. I expect to have around 6 trains on the layout and run 3-4 at the same time. I'm considering dividing the purple line into two so I can simulate traffic coming to stations from 2 directions at the same time. As crammed as it looks I do believe the use of elevation makes this acceptable and I managed to avoid most of the toyish stuff of crammed layouts.THE PROBLEMS (...or at leas some of them. Please, do correct me where I’m wrong) 1) Tight curves and S curves: I ran all the Kato RhB stock on R15 S curves and and #4 turnouts for hours. Even the stock Allegra short couplings were fine. I know I’ll have to be picky what stock I use but having no N scale stock except the Kato RhB, I’m fine with that. 2) Track near the edge of the table: I’ll have a natural barrier everywhere but for the two viaducts on the yellow line. I’ll probably put some rerailers on them. As for all stations being aligned with the table, every time I rotated them a bit it messed up the rest of the layout. Also thanks to all the elevation it doesn’t look as bad in 3D as it does in 2D. 3) Steep grades: I’ve got around 3% in visible areas and under 5% in tunels and on the helix. I tested way steeper grades and the stock worked fine. The only place where I sruggle is the 3,2% incline on the yellow viaducts as I haven’t figured out how to tilt a set bridge. I’ll cross those bridges when … they arrive from Germany :-] 4) Tunnel access: The track is gonna be hard to maintain but hey, it’s Switzerland. The whole benchwork is going to have wheels so I can take it to the middle of the room to get to the rear side. I managed to get a 40x40cm access area inside the spiral tunels from where I can reach in some of the others. 5) Coupling madness: As Chur will be hard to reach, I’ll do most of the uncoupling in Filisur. I might even install a turntable later. I’ll be using the Kato short couplers so this is not going to be a big thing on this layout. I also have no industry sidings, which I might regret. 6) Visual dividers: I think the altitude and massive ridges and valleys work well. The only issue I have is the Filisur-Chur bottom line is too short so that corner tunnel / city will have to do. 7) Structures: I hate gluing together those little buggers with a passion. That’s why both Preda and Filisur villages are outside the layout. For Chur I’ll get some prebuilt Kato city buildings and be done with it. CONCLUSION I’m now in the process of testing the material I’ll be using and still at least a month from doing anything irreversible so all constructive feedback is welcome. I know a lot of the stuff falls in the very hard - best to avoid category so especially love to know if there is anything you’d consider impossible or utterly wrong. In return I’m planning to upload to Youtube some of the extensive test of Kato track and stock I did. Also, if you read this far, I’ll share the two most helpful things I discovered in the last two months of research:Mr.Benchwork – epic info on benchwork, track laying and even building a control panel. It kinda made me feel I lost time watching all the other videos. This dude knows what he's doing and I have about 4 pages of notes after watching his vids.AnyRail – I’m super happy with this software but the point is found a pretty useful trick the tutorials don’t mention. I created my own track “library” next to the layout that only includes the parts I use. This way I have curves sorted by radius and straights by length. If I want to connect a short straight section, I select a couple of the shortest straights and cope-paste them to the area I’m working on instead of finding them all individually in the stock library. It’s useful to glue your library so that stuff doesn’t go missing. The only thing I haven't figgured out is how to model valleys (height contour only makes terrain higher, not lower). Thank you for reading. Any feedback is most welcome. Edited January 2, 2022 by Tyraforce Image embeds 7 Link to comment
cteno4 Posted January 2, 2022 Share Posted January 2, 2022 Wow! That’s a wild layout! Seems like you have done a lot of research. Only thing I can recommend is to try to mock-up as many bits of each of the line you can with track at hand to make sure the plan has no gotchas. While testing individual gradients and curve configurations tells you a lot, you have a lot of very wind curves and gradients going on here and there may be an odd permutation that causes issues and better to work that out before you build your track base and lay track. You can just use cardboard to make track bases and prop up with pieces of wood or cardboard supports and a lot of tape! for track cleaning look at this article, using the more non polar cleaners like wd40 contact cleaner (not wd40 lubricant) may help prevent gunk buildup on hidden tracks more than usual cleaners like isopropanol. Application with cleaning cars like the roller type may then be able to keep the hidden track clean without needing to reach by hand. https://s3-us-west-2.amazonaws.com/mrhpub.com/2019-05-may/online/index.html?page=9 other cool thing to think about is mini video cameras are now dirt cheap and maybe run some to the hidden areas and then you can just monitor where there is a problem and not have to do to much searching for what went wrong where. Please keep us posted on the progress it will be really fun to watch come together. cheers jeff 1 Link to comment
Tyraforce Posted January 2, 2022 Author Share Posted January 2, 2022 Thanks for the suggestions, Jeff. I'm just waiting for last few track shipments and I'll build and test every curved section one by one. Got a big old box of Lego for that. I hope to be able to reach pretty much everywhere but I'm sure going for a cleaning car when this is all done. I'll read the article. As for cameras, I have a nice set of 8 we just uninstalled at my company. They're compact enough for tunnels but it may be fun to have a bird's eye view as well. I'll post some vids from the tests. Link to comment
cteno4 Posted January 2, 2022 Share Posted January 2, 2022 22 minutes ago, Tyraforce said: I'm just waiting for last few track shipments and I'll build and test every curved section one by one. Got a big old box of Lego for that. Cool, excellent use of legos! Ive been bit by some track permutations that should work but we’re just cranky for some reason. In your case it’s going to be a vertical jungle of track supports so not so easy to go back and fix something. The RhB trains seem to do well with the tighter radius stuff like the prototypes do. 22 minutes ago, Tyraforce said: I hope to be able to reach pretty much everywhere but I'm sure going for a cleaning car when this is all done. I'll read the article. yeah I’m moving away from isopropanol for track cleaner and even for loco overhauls and going with contact cleaners. I like the roller wheel cleaners as they do a bit of mechanical action along to applying cleaner. 23 minutes ago, Tyraforce said: As for cameras, I have a nice set of 8 we just uninstalled at my company. They're compact enough for tunnels but it may be fun to have a bird's eye view as well. cool, yeah they are getting tiny and cheap and fun to use like this. Security systems also that allow to switch between grids of 4 camera, switch it one full screen, etc. the little battery operated rf cameras are also fun to just plunk down around the layout to see the trains going by at a more prototypical viewpoint. Cheers, jeff 1 Link to comment
Tyraforce Posted January 11, 2022 Author Share Posted January 11, 2022 UPDATE: All of the track and track related buildings have arrived as well as all the samples of rolling stock I want to use. I built every piece of the layout, tested a 9-car train on 6 grade together with 150R curves and met no problems. I spent hours testing the dreaded #4 Kato point and dicovered it only caused derailments when a L turn leads into a L point and vice versa. Two #4 points forming a crossover can be run at full speed backwards in any config including some 30yo long cars. All the Kato stuff I ordered surprised me as I found nothing to complain about. Faller on the other hand... Behold the mighty Landwasser viaduct... Not exactly as shown on the box. A freaking loco shed is taller than this. I even boght their biggest N scale bridge to extend the pillars. Still looks really bad. I don't want to start a war with Switzerland so I guess I'll have to scratch build it. I hope I can find some Landwasser plans. Well, back to the drawing board.... 5 Link to comment
cteno4 Posted January 12, 2022 Share Posted January 12, 2022 Might try tuning the #4 by cutting a little groove to let the blade blend into the rail face better. good job testing this all out. Glad to hear only a few little issues, but better now than once built. cheers, jeff Link to comment
Tyraforce Posted January 16, 2022 Author Share Posted January 16, 2022 UPDATE 02 More testing and changes. Building a different section every day while waiting for the benchwork base to be built. Unitrack's great for that. -reversing loop upgraded so it can be accessed from both directions. Works fine. I'm considering the Kato 22-017 transformer for it. I do want to run two trains on the yellow line, which is now close to 20m long, so I'm just surprised nobody seems to use it. -"Chur" changed so it can accomodate a regular Kato island platform (center) as well as a double lenght one (right, behind the current one), which can take trains up to 130cm on the yellow line. -more gradient tests - the Allegra train in the picture can go up to 7% incline even at low speed and so can all the GEs - I find 5 more than safe -yard moved under Filisur and extended to 170+cm, again, no problems with #4 switches -Landwasser blueprint aquired - that thing is huge. I decided to reduce it to 60% if N-scale and it's still 24cm tall (double of what I had planned) -] more changes -6 pin momentary switches for control panel tested - managed to wire them without soldering using el. spades Only one nasty problem I had no idea DC layouts faced. The cars with lighting kits bridge blocksso I get surges if the blocks use different voltage. I don't think the engine itself minds too much crossing the voltage treshold but I have to get rid of the bridging thing. I'm not fond of switching blocks between transformers and I'm hoping to use voltage regulators to limit speed in some areas such as stations. 6 Link to comment
Tyraforce Posted January 18, 2022 Author Share Posted January 18, 2022 (edited) UPDATE 03 Lots of good news today. Breakthrough #1 I figgured out the power bridging problems. What confussed me was that the Glacie Express cars don't have lighting prep while all the other RhB cars do. The lighting prep includes 2 pieces of metal connecting all wheels on each side of the train thus creating a bridge that caused all the jerks while crossing to a block with different voltage. I suppose when I cut connections to one side of the train, I'll get worse lighting quality but it should get rid of most of the bridging problems. Breakthrough #2 After lots of trial and error I realized the Kato double crossover CAN in fact be used to create a reversing loop if you're running DC and are willing to cut two gaps in it. I don't think I've seen this used. I do believe this is the easiest and cheapest way to build a 2directional compact reversing loop provided you hide some elements of it as it's not prototypical. Out of the box the crossover has insulation gaps in all the rails except the 2 outer ones. Cutting gaps in those will basically separate it into 4 turnouts, which are completely insulated. As you don't run a train to 2 sections of oposing polarity you'll have no shorts an you can do whatever you want with it. In my layout the visible reversing loop is a part of the regular continuous loop and only does the reversing when needed (and you have vision needed to control it). I just love this. If I were to eved build a dogbone, I'm pretty sure I'd integrate this into a station in the middle of the layout. Here's a little shaky test I did. The only tricky part was cutting the gaps as Kato track is not really great for it. After failing a lot of practice cuts with whatever tools I had I took the crossover to my friend's dental lab where it took them 5 min including filling the gap (after they stopped laughing). Here's basically how you do it but it's harder than it looks without exactly the right tools. Edited January 19, 2022 by Tyraforce 2 Link to comment
cteno4 Posted January 18, 2022 Share Posted January 18, 2022 Sweet reversing loop. I think I’ve only seen this happen by mistake and reversing not actually wanted! a cutting disc on a roto tool is be the best solution in this case, just has to be done at a little angle unless you have a flexi shaft and thin handle to get the disc perfectly perpendicular to the rail. If you do get a jagged gap dab of epoxy like the dentist did is perfect then polish it off. I’ve gapped rails like this once they were installed. Good fun for the dentist’s office! Hey maybe your dentist can go into business with your local model railroad club! jeff Link to comment
Tyraforce Posted January 23, 2022 Author Share Posted January 23, 2022 (edited) UPDATE 04 I ran two more tests today. 1) To automatically reduce speed in some of the nastier sections and stations I'm going to use a buck step down power converter. Basically, it's a $4 board where you set the max output volatge an no matter how much the input is, the output will not exceed the set voltage. You can connect it to multiple blocks and train will slow down on those to the set speed or lower. This is IMHO a much better tool than soldering a couple of diods to each block. You can change the voltage (speed) at any time with a screwdriver and can display input/output voltage at any time. The problem is it requires certain polarity and does not work when you switch it on the power pack. The solution would be to switch polarity after this device. I'd need to switch all the speed modules at the same time tho so that would be a rather nasty switch. A 4PDT switch should take care of 2. 2) I once again tested grades. I built a very curvy R150 layout on a kitchen table and then put some books under the table reaching a gradient of 7% , which is both way beyond what I want to use. I left the track unsupported flat on the table (banked the wrong way). I tested all the stock I had in different configurations and max speed. I also added a straight downhill section so the train would reach max speed. I had zero derailments although the turns would sure eventually take a toll on the stocks. When ran at 1/2 throttle the trains seemed to have no problems at all. So far so good. Edited January 23, 2022 by Tyraforce Link to comment
Tyraforce Posted January 28, 2022 Author Share Posted January 28, 2022 (edited) UPDATE 05: Massive chages to the layout plan. I dumped the 3 loops idea and I'm slowly moving towards the more "grown-up" solutions. This is version 62 of the plan and I'm not sure if I ever stop making changes. I discovered Tomix Tnos and that kinda solved the "how to stop in stations" problem. I'm most likely gonna use the layout 3, ex2. on the yellow line controling the top 4 tracks. I do believe I'll be able to change the train when going thru the yard without Tnos noticing. I guess this is not a bad entry into automation keeping in mind I can replace it with something more sophisticated later that would control the whole layout. The Yellow express line is now a kind of a twisted dogbone -the reversing loop is no longer needed as the yellow line now serves as a reversing loop for the other two lines. -I gave up trying to use Kato for the Chur station and decided to go with Tomix for the station section, which also enabled me to run 6 tracks thru it. This will, however, slow me down as I have to wait for all the Tomix track to arrive from Japan. -I really don't like the Tomix feeders. I think I'll just solder wires to the rails from the bottom side. -I love the fact I have two thru track not adjecent to any platform where I can speed thru the station. -I bought the big red Tomix bridge (bottom) - it's amazing and easy to transition to Kato even without the transition parts. -The yard got moved to a more acessible position and the entry got a #6 compount configuration to play it safe. It has 6 slots of 120 to 150cm. -a 55cm access hole got added in the middle to help build and maintain this crazyness The green line got changed to blue so it doesn't interefere with signal LEDs and still remains a loop, although the jury is still out on that one. -slight changes to the points at Filisur led to an even longer 120cm platform. -a level crossing added right of Filisur to provide access to the new loading area -the plan was to cut the ramp of the level crossing so it would fit onto the board but after I ordered the parts I realized it has some modules in it so it might not be doable The purple Preda line is probably not going to be a cont. loop. Othervised unchanged so I left it out of the plan. Edited February 4, 2022 by Tyraforce 4 Link to comment
cteno4 Posted January 28, 2022 Share Posted January 28, 2022 Wow lots of work on the rr! jeff Link to comment
Madsing Posted January 29, 2022 Share Posted January 29, 2022 6 hours ago, Tyraforce said: I really don't like the Tomix feeders. I think I'll just solder wires to the rails from the bottom side. I agree. Tomix feeders are ok for temporary layouts but not if you plan to glue and paint the tracks. I am starting to have contact problems after a few years of operation and I am now removing all feeders. Fortunately, it’s quite easy to solder wires, as you write, on the flat bottom of the rails, not the side. 1 Link to comment
katem Posted January 29, 2022 Share Posted January 29, 2022 (edited) 17 hours ago, Madsing said: I agree. Tomix feeders are ok for temporary layouts but not if you plan to glue and paint the tracks. I am starting to have contact problems after a few years of operation and I am now removing all feeders. Fortunately, it’s quite easy to solder wires, as you write, on the flat bottom of the rails, not the side. Does that apply to the 5538 feeders that clip to the bottom of a rail as well? So far they are pretty reliable for me, even when used (attached and put off) a lot on temporal layouts. 5538 is, among others, compatible with most ordinary PC tracks (>=70mm straights, 45° curves and C541-15 curve). Edited January 29, 2022 by katem Link to comment
roadstar_na6 Posted January 29, 2022 Share Posted January 29, 2022 I wish 5538 was compatible to regular rails as well ☹️ 1 Link to comment
Madsing Posted January 29, 2022 Share Posted January 29, 2022 2 hours ago, katem said: Does that apply to the 5538 feeders that clip to the bottom of a rail as well? So far they are pretty reliable for me, even when used (attached and put off) a lot on temporal layouts. 5538 is, among others, compatible with most ordinary PC tracks (>=70mm straights, 45° curves and C541-15 curve). Unfortunately, in my opinion, yes. That also applies to the 5538 feeders. I have to point out that the feeders that failed were on a section of track that had been ballasted and painted (with an airbrush). It is likely that the paint and/or glue “made its way” to the bottom of the track and, over time, caused the electrical contact to fail. As the 5538 feeders are invisible below the track (that was initially the reason why I liked them), they are unreachable once the track has been glued to the layout and impossible to repair… 1 1 Link to comment
roadstar_na6 Posted January 30, 2022 Share Posted January 30, 2022 (edited) For ballasting with the regular feeders you'd need to find a solution where they can still be pulled out, the 5538 would need a cutout in the base board for repair-access. EDIT: Wires soldered to the rails also make repair/replacement not too easy once the rails are pinned down and ballasted in. Edited January 30, 2022 by roadstar_na6 1 Link to comment
Madsing Posted January 30, 2022 Share Posted January 30, 2022 Yes, I agree. A cutout to access the feeder from below the rail is a good idea. But in my experience, soldered wires will never fail if the solder has been done properly. Link to comment
cteno4 Posted January 30, 2022 Share Posted January 30, 2022 Wires soldered well and sealed in with a dab of epoxy have never needed repairs on anything I’ve done. they will be more rock solid than any just physical track connection and prevent any corrosion at the contact point. I tin the rail and wire separately, then dab of flux and do a fuse solder of the wire to the track. Makes a very good connection and minimal heat time on rail to save plastic rail bed and wire insulation ends. Epoxy dab helps seal it from moisture and a bit of a strain relief (I try to get the epoxy up over the end of the insulation). I did this specifically on Ttrak modules where wires are times get yanked. I had one soldered joint break a long time back on a Ttrak module where the wire got a real hard jerk and it broke the wire just after the solder joint, thus now the epoxy! I also use 18 or 16g (bit overkill) wire to the track so it’s beefy I’ve even gotten rid of any yanks by now using a little terminal block under each module so the track wires can never get yanked and If the buss wire does get a yank (even being careful they have this tendency to get caught on things all the time on setup and teardown) it’s pulled loose at the terminal strip and easy repair. Also lets me change buss connectors easily. My approach now is put feeders soldered under the rails on all modules to terminal then you can just attach buss feeders where you need them and with the needed connectors to the buss being used. I’ve seen folks use little terminal blocks under layouts so that they don’t have to do splices in feeder wires or premeasure wire needed to buss or power source. Simple just prewire all your feeders with same short length to hook tone terminal then just do the rest of the wiring as needed later. Allows for easy diagnostics to easily unhook connections or rewire differently if wanted later. Simple little euro style terminal strips are cheap and easily whacked up into smaller sets. Tons of push lever ones now so no screwing as well. If you want good end connections that are less prone to physical damage a simple terminal cap with a hex crimp on it solves that and can give you nice color coding as well. jeff 1 1 Link to comment
cteno4 Posted January 30, 2022 Share Posted January 30, 2022 Forgot to add, I put a dab of flux on the rail before tinning and use a chisel tip so I can have a nice long contact strip to warm things fast and get a long tinned surface fast, again to be kind to the plastic roadbed. On tinning the wire I usually dunk the stripped end in flux as well as it usually has a really rapid suck of the solder into the strands and if you pull the solder wire back at just the right time you don’t end up with a huge blob on the outside of the wire. i cut my slots with a small 1/8” rototool drum/end milling bit. I put it in the drill press and set the stop so it just goes thru the roadbed. I just have the rail up against the fence (or just clamp a small piece of wood to use as a fence. You can then just drill in on one end and slide the rail along the fence to cut the slot. Flip the track around and do the other side then. You can do it by hand with a roto tool, but it’s harder to get a pretty slot! jeff 1 Link to comment
James-SNMB Posted February 1, 2022 Share Posted February 1, 2022 @Tyraforce, cool layout! Looking forward to seeing it come together. I have recently been eyeing up the Kato rhb allegra and have been sketching up a (smaller) layout for it to run around someday, so I'll be taking some inspiration from your layout. Your grade test reminded me of this video I found a few weeks ago: Pretty impressive these models can hustle up those kinds of grades. 2 Link to comment
Tyraforce Posted February 4, 2022 Author Share Posted February 4, 2022 On 2/1/2022 at 11:36 PM, James-SNMB said: @Tyraforce, cool layout! Looking forward to seeing it come together. I have recently been eyeing up the Kato rhb allegra and have been sketching up a (smaller) layout for it to run around someday, so I'll be taking some inspiration from your layout. Your grade test reminded me of this video I found a few weeks ago: Pretty impressive these models can hustle up those kinds of grades. Well if the prototype Bernina express can do 7,5% why shouldn't the models, right? I'm still waiting on the benchwork base and all the Tomix track I decided to install so I won't be able to show much for another month or so. I'd seen the layout you sent. I'm not a fan. Too simple for my taste and I don't like putting those two landmarks (which aren't even on the same line) together. This is a very nice and very compact layout:https://www.youtube.com/watch?v=Ow3T1plrZfM&list=PLmd-u39jrKUVG8BoF7ogaU0rvYOnkCesY&index=2 I'll be looking forward to your trackplan! 2 Link to comment
James-SNMB Posted February 5, 2022 Share Posted February 5, 2022 That is a nice looking layout in a small space for sure! I like the winter scenery. I've got three young kids age 2 to 6, so don't hold your breath waiting for any progress from me! Your one month timeline sounds like warp speed to me. No pressure to deliver. Link to comment
Tyraforce Posted February 6, 2022 Author Share Posted February 6, 2022 On 2/5/2022 at 1:30 AM, James-SNMB said: That is a nice looking layout in a small space for sure! I like the winter scenery. I've got three young kids age 2 to 6, so don't hold your breath waiting for any progress from me! Your one month timeline sounds like warp speed to me. No pressure to deliver. My kids are 3 and 8 so not much of a difference 🙂 Link to comment
Tyraforce Posted February 20, 2022 Author Share Posted February 20, 2022 (edited) UPDATE 06 This is probably the last planning update as the benchwork has arrived and I'm almost ready to go for the build. I had the support structure built by a carpenter. He used joints I didn't know existed and the whole thing can be take apart easily. I installed wheels so i can turn the whole thing around wehn building the remote sections. Then I realized the floor is far from flat (2cm difference on 100cm). I did expect this but 2cm is more that I'd thought. I did manage to get it level fairly easily but moving it is gonna be harder. Still fairly easy compared to convincing my wife this all goes into our living room 🙂 I use 18mm plywood for the extra supports. I bought a set for these pocket joints and they are great. This is the first one I've ever made. Got it perfectly level first time around and it took just 10min. I'll be using flexible 8mm plywood even in level sections and build the scenery from extruded polystyrene. The operation on the plywood is surprisingly quiet and I suppose using silicon to attach the track will imrpove this still. This will be the lowest section of the layout with the Landwasser river being 5cm bellow the frame to give the Landwasser viaduct some extra height. Here's some of the bridges I'll be using. I'm surprised the gray kato bridges (left) differ in color. The Noch viaduct (center right) can fit Kato track but I'll need to find a way to burry it in it as it's too high. The faller bridges are designed for flex track. I decided to increase the radius of a couple more curves so I'm on hold waiting for more track. Then I'll start building the longest and steepest ramp of the layout and running some tests on it. Edited February 20, 2022 by Tyraforce 3 Link to comment
Recommended Posts
Create an account or sign in to comment
You need to be a member in order to leave a comment
Create an account
Sign up for a new account in our community. It's easy!
Register a new accountSign in
Already have an account? Sign in here.
Sign In Now