paolo Posted October 15, 2018 Share Posted October 15, 2018 (edited) Hello guys, after some long months of thinking, I've come up with my layout. The basic idea is to reproduce, very very loosely, Tokyo Station. So there are three lines, not intersecting: one Shinkansen line for the Tokaido line (dark blue), one for all the other Shinkansen (light blue), and one for the local/Express lines (yellow). Unfortunately I have so space limitation, since I'll put the layout in my living room: max width is 70cm. max length 240cm. In the lower part there is main station, then the thick blue line is a backdrop where I'll put a picture of Tokyo skyline, and in the back the hidden station. I'm using Kato Unitrack, DCC. I've built a compact mockup of the layout, everything seems to be working. I was a bit afraid cause I'm using two R282-45 curves for half of the Tokaido line, but I haven't seen any issue with the N700A. I had to modify all of the EP481 turnouts, filing some of the rails, as all the Shinkansen trains were derailing. I guess the EP718 would be better, but I have no space to put them. I have these trains, all Kato: Shinkansen: N700A Nozomi, 10-1175 E5 Hayabusa, 10-857 & 10-859 E7 Hokuriku, 10-1222 Express/Local: E657 Hitachi/Tokiwa, 10-1397 E233 Chuo Line, 10-1473 They are all DCC, with the Kato EM13 and FL12 decoders I’m planning on 3d printing the platform roof, cause I didn’t want to buy the Kato or Tomix one, I’d like to make them closer to the actual ones, which are all different: https://1.bp.blogspot.com/-EOT6OeXq1Lk/Tf9-SWF6stI/AAAAAAAAAHI/ZeNT54prHMs/s1600/Tokyo Station.JPG I wanted to avoid the oval closed circuit, cause it doesn’t seem real. As a result, you won’t see much of the trains, just the train stations and part of the curves. But with the small space, I guess there’s not much I can do. Any idea to improve the layout is welcome. This is my first attempt to build a layout, so please go easy 😉 Edited October 18, 2018 by cteno4 Photo upload 1 Link to comment
kvp Posted October 15, 2018 Share Posted October 15, 2018 Just two ideas: Elevate the Chuo line terminus and add the Yamanote loop line stop under it. As an actual loop, like on the prototype. You could make it duck under the Tokaido shinkansen track in the back. It's possible to use different types of platforms like Tomix/Kato standard/city/country/suburban to have different platform and roof styles. Link to comment
paolo Posted October 15, 2018 Author Share Posted October 15, 2018 Wow, yes, those are great ideas, thank you so much! The elevation of the Chuo line is not a problem. For the Yamanote line, the problem is that the curve radius to close the loop would be 18cm, using four of the Unitrack Compact Curved Track R183mm-45. Now, can the Yamanote cars take such a small radius? All I read online is that the minimum is 24cm (I also read that for the Shinkansen the minimum is 31, but they can go fine with 24). Link to comment
kvp Posted October 15, 2018 Share Posted October 15, 2018 Tomix basic sets could usually go down to around 140 or 177 mm curves. My Tomix Yamanote line 231 series (SG with rapido couplers) and 103 series (HG with TN couplers) could run on Kato Unitrack 183 mm curves (the 231 runs fine on 150 mm too). I have these end curves on my home ttrak layout. So it works, just try to avoid S curves. I don't know how well Kato sets run on these tight curves, but most 20 meter commuter stock should run on 183 mm as long as there are no reverse curves or turnouts within ~150 mm of the tight curves. ps: For Tomix shinkansen the minimum safe for S curves is 280 mm as this is the radius of the Tomix double crossover. Link to comment
paolo Posted October 15, 2018 Author Share Posted October 15, 2018 Perfect, that's all I needed to know, thanks! There will be four 18cm 45 degrees curves, and then two straights, so it shouldn't be a problem. I'll buy the 18cm curves and give it a try. As it just so happens, I'll be in Tokyo for a few hours on a business trip in a couple of weeks, so I can buy the remaining unitracks and the Yamanote set (and maybe one more Shinkansen...) 😋. They're so much cheaper than in Italy, at least 50% off. So it will be something like this (plus the elevated Chuo line): 6 Link to comment
Socimi Posted October 18, 2018 Share Posted October 18, 2018 My suggestion would be something similar to this There are the prototypical elevated Chuo Line tracks with their double crossovers, where you could run a variety of stock (E233-0, 201, E257, E531 and 183 series). The Yamanote line platforms (that can also double as the Keihin-Tohoku or Tokaido Line platforms), and the Shinkansen station, that in reality has 6 tracks for the Tokaido Shinkansen and 4 for the Tohoku, Joetsu, Yamagata, Akita and Hokuriku Shinkansen, here it has been "cramped" to just four tracks. Another idea could be to add two more tracks, where you could run Keihin-Tohoku line trains (E233-1000 or 209 series), they shouldn't use much space, as one runs almost below the Chuo Line tracks. Then if you'd like to add even more, there are the underground platforms of the Yokosuka, Sobu and Keiyo Lines and the Maronouchi Subway Line. As for the scenery, i'd suggest a nighttime setting, something that is rarely seen, but with Tokyo station as subject it could be quite interesting. 1 Link to comment
paolo Posted October 18, 2018 Author Share Posted October 18, 2018 Ciao Socimi, thank you for your ideas! The problem is that I have a really small space where I'll put the layout, I cannot go higher than 70cm by 240cm. And in 70cm unfortunately I cannot fit all those lines. I'm already using 28cm radius curves for the Shinkansen, which is already its limit. And also 18cm for the Yamanote line. It would be nice to have a big space to really work on reproducing Tokyo Station, but not in my living room 😞 For sure I'll put a lot of LED's, cause the idea is also to have it illuminated as a night scene Link to comment
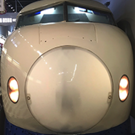
paolo Posted November 23, 2018 Author Share Posted November 23, 2018 (edited) A little update on my project. I recently took a trip to Tokyo and bought a few more pieces (I love Yodobashi Camera, so many beautiful things there...). I bought a few train sets. The E6 Komachi (10-1136) to be coupled with the H5 (10-1374): Then I bought the add-on set for the E5 (10-858): I know it's wrong, but I'll probably give one car from the E5 add on to the H5-E6, so that I'll have three E6 cars and four H(E)5. No body will notice... 😛 Then I got the E235 (10-1468 1469) for the Yamanote line: I got the Kato DDC decoders for all these new trains: And finally the 21cm and 18cm radius Unitrack curves. I tested them with the E235 and it works just fine. It doesn't look great but it works. Just for fun, I tested also the head car of the E5. On the 21cm it only goes backwards, it derails if going forward. On the 18cm no way... As expected. The next step will be starting to build the wooden base for the layout, I'll probably start this during the Xmas holidays. I've made a short video on how to put the Kato DCC decoders (EM13 and FL11) on a couple of Kato DDC-friendly train sets. It's very easy, but since I haven't found many videos about this, I thought it might help someone 😉 How to install KATO DDC decoders on KATO Japanese N scale trains Ciao Paolo Edited November 23, 2018 by paolo 4 Link to comment
Recommended Posts
Create an account or sign in to comment
You need to be a member in order to leave a comment
Create an account
Sign up for a new account in our community. It's easy!
Register a new accountSign in
Already have an account? Sign in here.
Sign In Now